
Fava Bean Salad With Mint And Ricotta Cheese

Medically reviewed by Christiana George Updated Date: June 8, 2023
Alright folks, I’m calling a temporary hiatus on the sweet and the sugary, buttery and just plain fattening. I’m on a diet! It’s not one of those diets where I want to gradually lose weight by crafting a healthy, sustainable lifestyle. No no no, I need to drop pounds quickly because I’m getting married in exactly two months!!! (The invitations went out last week; we’ve officially mobilized the troops. Gulp.)
For the record, because I know there are those of you reading this who know me in real life (hi Jeannie!), I am not overweight. But the food bloggers among you might be a little more understanding. After all, we make food, and lots of it. And unless your will is made of steel, you’re bound to eat more than you’d like. (My will is made primarily of marshmallows.) I tried on a few shirts the other day, shirts that fit me perfectly fine last summer, and realized that they’d grown a little snug. Not good, not good at all.
So that’s the story behind this recipe. As I’ve never seriously undergone a diet before, I’m not sure how to approach this new way of eating. It’s not like I eat unhealthily most of the time, ya know? So I’ll rely on common sense rather than the dictates of an official Diet, that is, lots of vegetables, lots of fruit, smaller portions, etc. etc. Nothing revolutionary or dramatic. We don’t even own a scale.


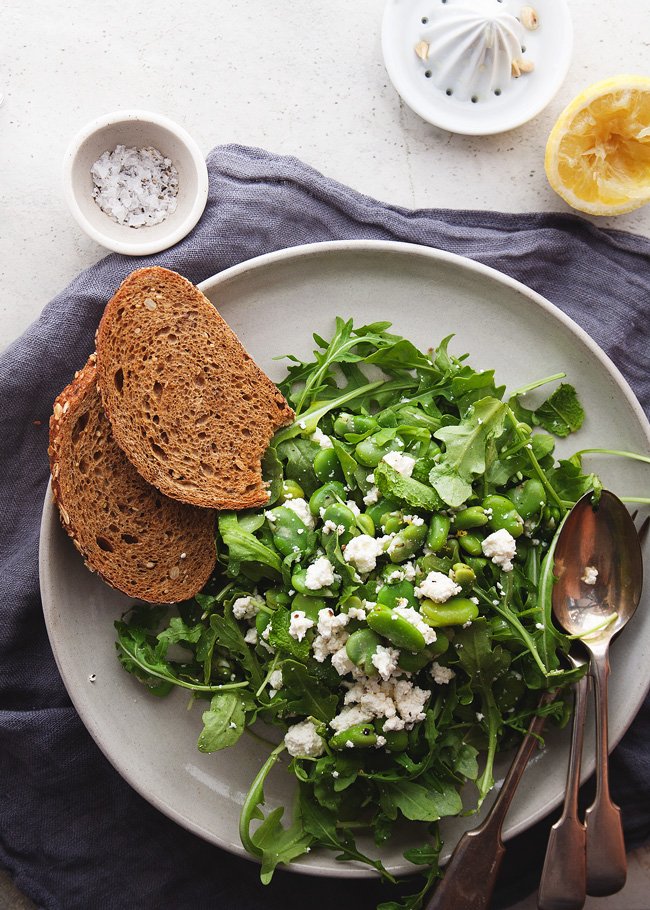
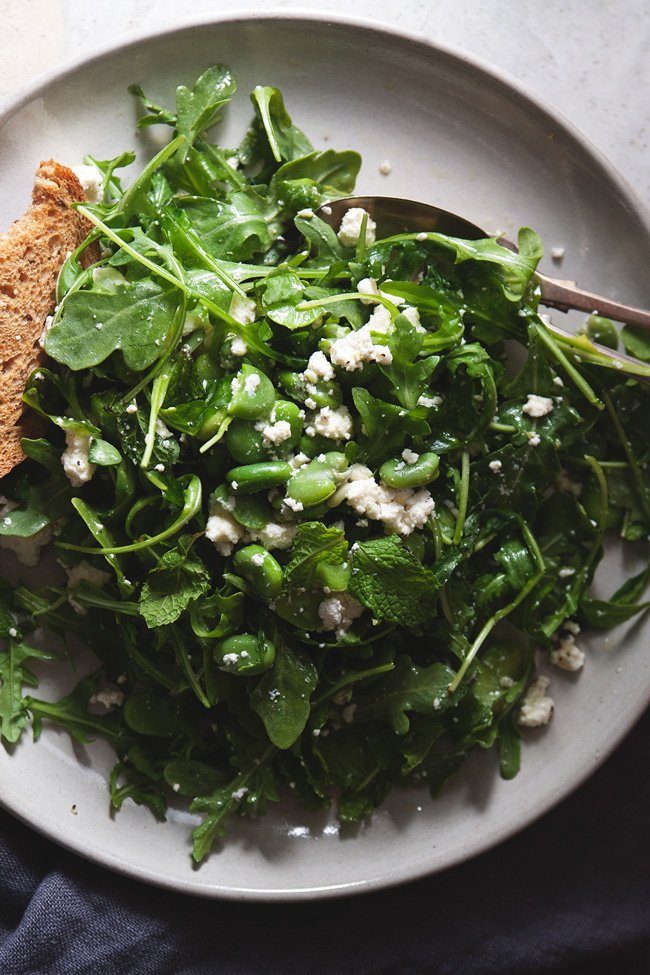
I absolutely love fava beans. After receiving my copy of Polpo awhile back, I’d made a note to myself to make a certain broad bean, mint, & ricotta bruschette as soon as broad beans (also known as fava beans) were in season. The time has come. But instead of serving the bruschette on toasted bread, I decided to toss it on a bed of arugula instead, thereby turning it into a vegetable-packed and therefore very wholesome meal.
It’s the trinity of fava beans, mint, and lemon zest that serve as the backbone to this salad’s flavor. Or rather, the mint and lemon zest do wonders to the flavor of the fava bean, brightening its somewhat stodgy taste. (You know what I mean, right? It’s part of the reason why I love fava beans.) With the roundness of ricotta cheese and the sharpness of arugula, I think this recipe came out really well-balanced and flavorful. (Although, and I’m realizing this only now, I do believe fava beans might be out of season… are they? They came exceptionally late to our farmer’s markets this year, and I held onto this recipe for a bit longer than I should have. Sorry!)

So if everything goes as planned, in two months’ time, I’ll be ready to face the people. (Yes, some part of me realizes how melodramatic I sound. But please don’t get me started on how ridiculous the societal pressures on the bride-to-be are. A wedding is supposed to be about the witnessing of a spiritual union between two people who’ve made a committment to spend the rest of their lives together. So why do I feel like I’m supposed to present myself at my most beautiful and blushing? How have I lose sight of the whole point? Why do I care so much?! … I’ll have all the answers when this is all over.)
FAVA BEAN SALAD WITH MINT AND RICOTTA CHEESE
Adapted from Polpo
Serves 2 pretty hefty portions
Ingredients:
- 2 cups podded fava beans
- 1/2 cup ricotta cheese (preferably homemade—easy as pie, promise!)
- 30 mint leaves
- 3 handfuls arugula
- 2 Tbsp olive oil
- Zest of one lemon and a good squirt of lemon juice
- Salt and fresh pepper to taste
Directions:
Place the fava beans in boiling water for a couple minutes, then plunge into cold water, drain, and remove their skin. Toss the beans carefully with the cheese, and mint leaves, and arugula. Then mix in the olive oil and lemon zest/juice until combined.
Serve with salt and pepper, and any kind of bread.
Related Posts

Subscribe for New Racipies
Get mental health tips, updates, and resources delivered to your inbox.
Moonshine Marshmallows

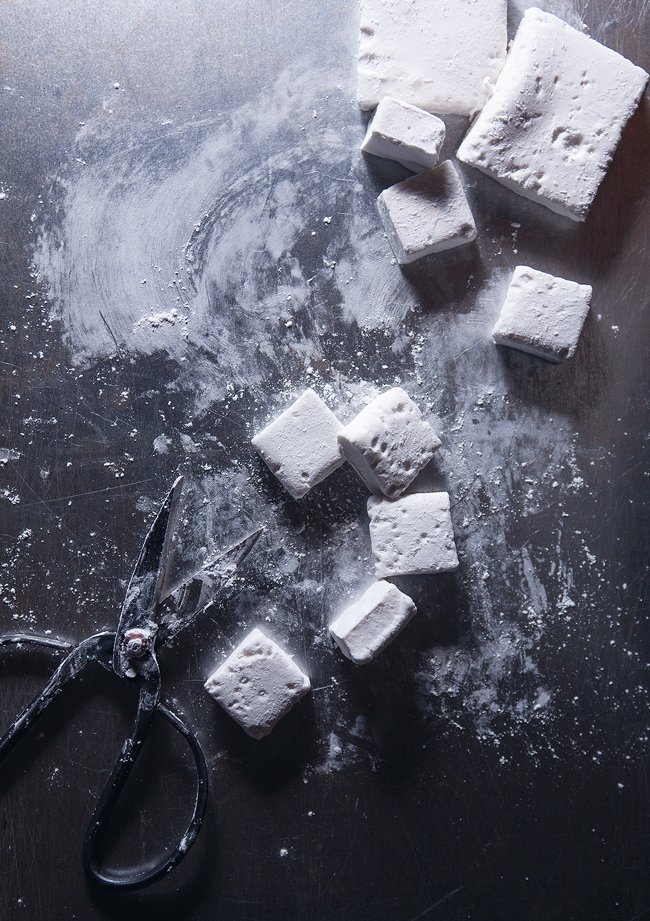
I was originally inspired by the recipe for Blue Bottle Coffee’s moonshine marshmallows, but after making it multiple times, and failing, I finally had to admit defeat. But that doesn’t mean I can’t use the name, now does it? A moonshine marshmallow certainly sounds much more intriguing than a bourbon marshmallow.
This is my first entry for a giftable holiday treat, and a winning one it is at that. These marshmallows look adorable, feel as soft as, no, wait, softer than pillows, and taste incredibly luscious.
Imagine creamy hot chocolate spiked with bourbon marshmallows… perfect for sipping in front of a wood-burning fireplace. Or for those of us who don’t have wood-burning fireplaces, our radiators. Actually, that’s the last place I want to be when it’s on; our apartment is hot enough as it is.
These also taste great in adult-flavored s’mores. (And if you use a 9-inch square baking pan instead of 8-, they cut into perfect-sized squares for the graham crackers.) To toast them, because again, there’s no wood-burning fireplace in my dinky little apartment, I pop them in the toaster oven where they do that funny expansion thing, bubbling and swelling like they’re about to come alive, and let them slowly turn buttery-brown. By then, the s’mores is a hot mess, melted chocolate and gooey marshmallow everywhere. It’s pretty much perfect.
Homemade marshmallows are pretty much perfect.
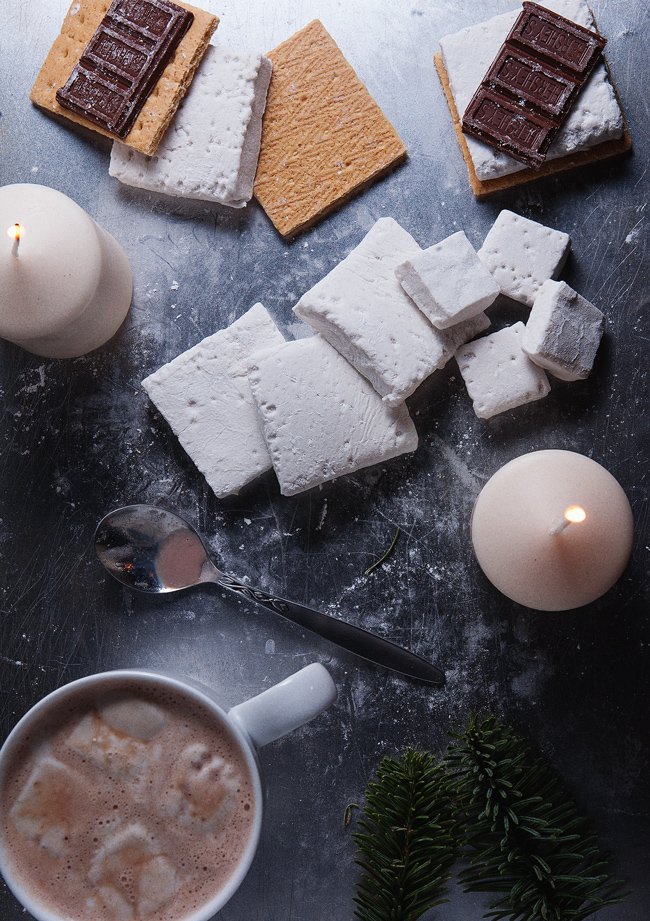
There’s no need to stick to bourbon. I imagine Bailey’s would work wonderfully. Or kahlua, or anything besides vodka (which doesn’t taste like anything except alcohol). You don’t even have to use alcohol at all—I imagine the recipe would work just as well with water—but what’s the point? Actually, scratch that. I’m not judging. I’m not the biggest fan of alcohol-tasting desserts. (But this one’s different, I swear!)
If you’re going to make substitutions with the sugar, I would advise against maple syrup. It tends to crystallize, and form razor shards. I cut myself on a piece, and it looks and feels like a paper cut. (They’re the worst!) I was initially uncomfortable with the idea of using corn syrup, but David makes a good case for it, and especially after my incident with the the maple syrup, I decided to just swallow my unease and pour it all in. The entire cupful.


MOONSHINE MARSHMALLOWS
Adapted from Epicurious
Makes 16 2×2-inch marshmallows or 64 1×1-inch marshmallows
Ingredients:
- 3 (1/4-ounce) envelopes unflavored gelatine
- 6 Tbsp bourbon, divided
- 1-1/2 cups sugar
- 1 cup light corn syrup
- 1/2 cup + 2 Tbsp water, divided
- 1/4 cup corn starch
- 1/4 cup confectioners sugar
Tools:
candy thermometer
Directions:
Line an 8-inch square baking pan with 2 sheets of parchment paper (completely covering all the edges inside the pan). Lightly oil the sides and bottom of the pan.
In a separate bowl, sift together the corn starch and confectioners sugar. Sift enough of this mixture into the prepared pan to completely and generously cover the bottom. Reserve the remaining cornstarch mixture.
Sprinkle gelatin over 3 Tbsp bourbon and 5 Tbsp water in bowl of mixer and let soften while making syrup.
Stir together sugar, corn syrup, a pinch of salt, the remaining 3 Tbsp bourbon, and the remaining 5 Tbsp water in a medium heavy saucepan (I used a 4-quart saucepan and it barely contained the liquid when it boiled up). Boil over medium heat, without stirring, until candy thermometer registers 238 to 240°F. Remove from heat.
With mixer at low speed, pour hot syrup into gelatin mixture in a slow stream down side of bowl. Increase speed to high and beat until very thick and mixture forms a thick ribbon when beater is lifted, 11 to 13 minutes.
With a lightly oiled spatula, scrape marshmallow into baking pan and smooth the top. Let stand, uncovered, at room temperature until surface is no longer sticky, 2 to 3 hours.
Remove from pan and carefully peel away the parchment paper. Dust the top and all the edges with the remaining corn starch mixture. Using a knife or scissors dusted with the corn starch mixture, cut the marshmallow into whatever shape you’d like. Dust all cut edges with the corn starch mixture to prevent sticking.
These should last for about a week or so, if kept in an airtight container at room temperature. If stacking the marshmallows, line between layers with parchment paper.
Related Posts

Subscribe for New Racipies
Get mental health tips, updates, and resources delivered to your inbox.