
Is Chamomile Tea Acidic? Benefits for Acid Reflux Explained

Medically reviewed by Aneeza Pervez Updated Date: May 13, 2026

Chamomile tea is a popular herbal drink known for its calming and soothing effects. Many people turn to chamomile tea for its potential benefits in relieving stress, improving sleep, and aiding digestion. But if you suffer from acid reflux or GERD (Gastroesophageal Reflux Disease), you might be wondering: Is chamomile tea acidic? And, more importantly, Can it help manage acid reflux symptoms?
In this article, we’ll explore the acidity of chamomile tea, how it interacts with acid reflux, and provide insights into its benefits for digestion. Whether you’re seeking natural remedies for acid reflux or simply curious about chamomile tea’s effects, read on to find out more.
Understanding Acidity and Acid Reflux
Before we dive into the specifics of chamomile tea, it’s important to understand the role acidity plays in digestion and its impact on conditions like acid reflux.
What Does Acidity Mean?
Acidity refers to the concentration of hydrogen ions in a liquid, which determines its pH level. On the pH scale, substances with a pH lower than 7 are considered acidic, those with a pH of 7 are neutral, and those above 7 are alkaline (basic). Common acidic foods and drinks like citrus juices, coffee, and soda can increase the acid content in the stomach, sometimes leading to acid reflux.
How Does Acidity Affect Acid Reflux?
Acid reflux occurs when stomach acid or bile backs up into the esophagus. This can happen when the lower esophageal sphincter (LES), the muscle that prevents stomach contents from entering the esophagus, doesn’t function properly. Acidic foods and drinks can exacerbate this condition, causing heartburn and discomfort. Therefore, many individuals with acid reflux or GERD are advised to avoid acidic substances.
Is Chamomile Tea Acidic?
Chamomile tea is often considered a safe and soothing option for people with acid reflux. So, is chamomile tea acidic? The answer is no — chamomile tea is actually slightly alkaline, which means it is a low-acid beverage. It generally has a pH level between 6 and 7, which is close to neutral.
Unlike other teas like black or green tea, which are mildly acidic, chamomile tea does not trigger the same digestive issues for most people. This makes it a great alternative for those trying to reduce acidity in their diet.
pH Level of Chamomile Tea
Chamomile tea typically has a pH level that is either neutral or slightly alkaline, depending on the brewing process and water quality. This makes chamomile tea an excellent option for those looking to avoid acidic beverages that might irritate the esophagus or trigger acid reflux symptoms.
Chamomile Tea vs. Acidic Teas
Chamomile tea stands out in comparison to other teas, such as black, green, or herbal teas like peppermint, which are more acidic and may trigger acid reflux for sensitive individuals. This makes chamomile tea one of the safest tea options for people with GERD or acid reflux.
Author Tip:5 Non-acidic Alkaline Tea for You!
Benefits of Chamomile Tea for Acid Reflux
Chamomile tea isn’t just gentle on the stomach — it also offers a range of benefits for people with acid reflux and digestive issues.
Anti-Inflammatory Properties of Chamomile Tea
Chamomile is well-known for its anti-inflammatory properties, which can help soothe inflammation in the esophagus caused by acid reflux. Chronic acid reflux or GERD can lead to irritation in the lining of the esophagus, and chamomile’s calming effects can help reduce this inflammation.
How Chamomile Tea Calms Acid Reflux Symptoms?
Chamomile tea can help calm the stomach and promote proper digestion. By relaxing the muscles of the digestive tract and reducing inflammation, chamomile may help decrease acid reflux episodes. This is why chamomile is often recommended for people suffering from heartburn or indigestion.
Additional Benefits for Digestion and Sleep
Chamomile also has mild sedative properties, which can help promote better sleep. Poor sleep quality is often linked to increased acid reflux symptoms, as lying down can make acid more likely to travel up the esophagus. Drinking chamomile tea before bed may provide a calming effect, helping you sleep better and reducing the chances of reflux during the night.
How to Drink Chamomile Tea for Acid Reflux
To maximize the benefits of chamomile tea for acid reflux, it’s important to drink it correctly. Here are a few tips to make the most of your chamomile tea:
Best Practices for Brewing Chamomile Tea
To make chamomile tea, simply steep 1–2 teaspoons of dried chamomile flowers in a cup of hot water for 5-10 minutes. The longer you steep it, the stronger the flavor and therapeutic benefits. You can also use chamomile tea bags for convenience. Drinking chamomile tea after meals may help soothe your stomach and improve digestion.
Additives to Avoid for Acid Reflux Sufferers
While chamomile tea itself is gentle on the stomach, adding certain ingredients can irritate the digestive system. Avoid adding sugar, honey, or citrus, as these can increase acidity. Instead, enjoy your chamomile tea plain or with a mild, non-acidic sweetener like stevia if needed.
Chamomile Tea and Bedtime Routine for GERD Relief
Drinking chamomile tea before bed can be especially beneficial for those with nighttime acid reflux. It promotes relaxation, soothes the digestive tract, and may help prevent reflux during sleep. However, be cautious not to consume too much fluid before bedtime to avoid frequent nighttime trips to the bathroom.
Other Herbal Teas for Acid Reflux
While chamomile tea is a great choice for managing acid reflux, other herbal teas may also provide relief. Some options include:
- Ginger Tea: Known for its anti-nausea properties, ginger tea can help soothe the stomach and reduce acid reflux.
- Licorice Tea: This herbal tea can help protect the stomach lining and reduce acid reflux symptoms.
- Slippery Elm Tea: Often recommended for soothing an irritated esophagus, slippery elm tea helps coat the stomach and may reduce acid reflux symptoms.
Chamomile tea remains one of the gentlest and most soothing options for those suffering from acid reflux.
Recipe: Citrus Pomegranate Mint Tea
Expert Opinions on Chamomile Tea and Acid Reflux
Many health professionals recommend chamomile tea for managing acid reflux. According to a study published in the Journal of Ethnopharmacology, chamomile’s anti-inflammatory and antioxidant properties can provide relief from gastrointestinal issues, including acid reflux. Herbalists and nutritionists also support chamomile tea as a gentle, non-acidic beverage that can help soothe the digestive system.
Clinical Studies on Chamomile Tea for Acid Reflux
Several clinical studies have shown that chamomile tea can help reduce inflammation and improve digestion. Although more research is needed to confirm its long-term effects, chamomile has been used for centuries as a natural remedy for digestive discomfort.
Herbalist Recommendations
Herbalists often recommend chamomile tea for individuals suffering from acid reflux due to its calming and anti-inflammatory effects. It’s seen as a safe, natural remedy that can help improve digestion and reduce symptoms of GERD when consumed regularly.
Conclusion
Chamomile tea is an excellent, non-acidic option for those suffering from acid reflux or GERD. Its pH level is neutral to slightly alkaline, making it gentle on the stomach and less likely to trigger reflux symptoms. With its anti-inflammatory properties and digestive benefits, chamomile tea can help soothe acid reflux and promote better digestion.
If you struggle with acid reflux, try incorporating chamomile tea into your daily routine. Whether you drink it after meals or before bed, it may offer natural relief and support a healthier digestive system. As always, consult with a healthcare professional before making any significant changes to your diet or treatment plan.
Try a warm cup of chamomile tea today to soothe your digestion and ease acid reflux symptoms!
Related Posts


Subscribe for New Racipies
Get mental health tips, updates, and resources delivered to your inbox.
Biscoff Cookie Dough Pops


Do you buy your mother flowers on Mother’s Day? Well, how about making some instead. These Biscoff Cookie Dough Pops are perfect for a special occasion and a special person. Kids can also get in on the action, if they don’t eat all the cookie dough first. It is pretty irresistible. If you like Biscoff Cookie Spread, you are going to love Biscoff Cookie Dough. It’s a wonderful combination of Biscoff flavor and raw chocolate chip cookie dough (don’t worry, no eggs involved). You’ve gotta try it!

Even if you don’t want to make the flower pops, you can still make regular round pops or truffles with this cookie dough recipe. I think I like it even more than the plain cookie dough recipe I used for my Cookie Dough Bunny Truffles. I use Wilton’s meringue powder as my egg replacer, so these are egg free and totally edible raw.

The dough is not heavy. It doesn’t feel a ton of bricks. It light, fluffy and oh so good. You get the flavor of Biscoff, but less sweet. I love to bake with Biscoff, but by itself it’s sometimes a little too sweet. In this recipe I substituted some of the sugars for Biscoff so the sweetness is reduced. You could just grab a spoon and eat the whole bowl while watching tv or you can make some pretty flower pops like I did.

I bought these silicone lollipop molds at Walmart during the Easter season. Each pack came with 2 mold of 6 pops each with space to add a lollipop sticks which were included. I don’t make candy lollipops, but I knew I could use it to make cookie dough pops.
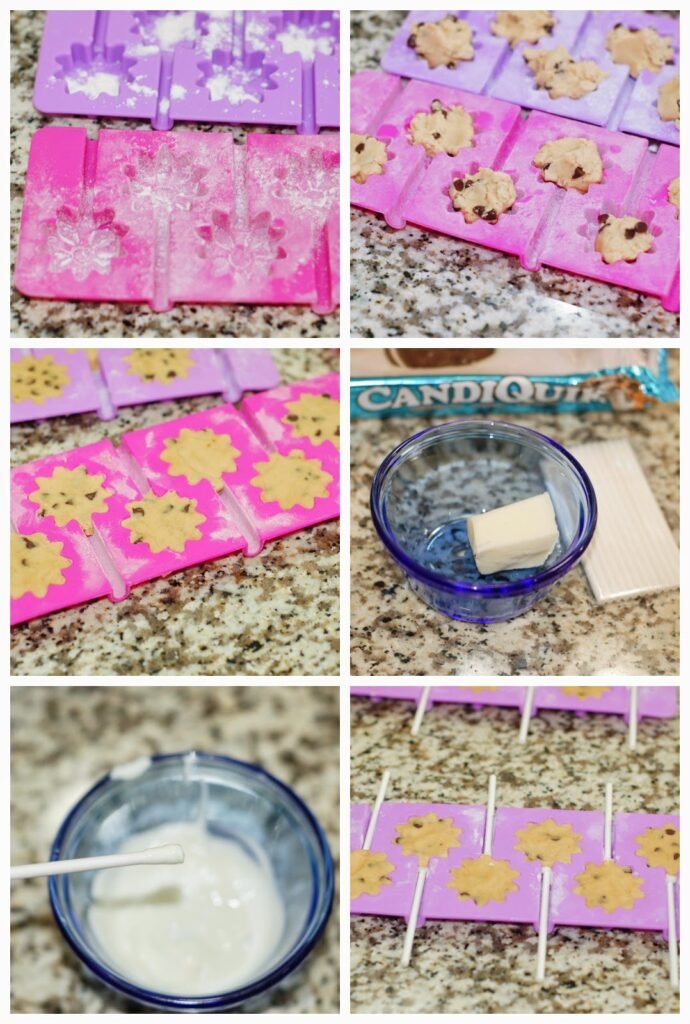
I just sprinkled some flour into the molds and shook out any excess. Then took a bit of dough and started pressing it into the molds until it was flush. To add the sticks, I first dipped them in some melted candy coating and then pushed them into place while placing my hand over the dough so the stick would go in straight. After that, it was time to pop them in the freezer. The first batch I left in there 4 hours because I was busy with other stuff, but the Bunny Truffles I had only placed in the freezer for a 1/2 hour and they were firm enough to remove from the mold. I all depends on how cold your freezer is.

You have to stretch and tug the silicone to loosen the pops. They came out great. Then it was time for dipping and decorating. You have to bring out only a few at a time from the freezer so the dough stays firm. My kitchen was very hot yesterday, so I had to be careful because once the dough softened up too much it fell off the stick. Also make sure your candy melt is not too hot.
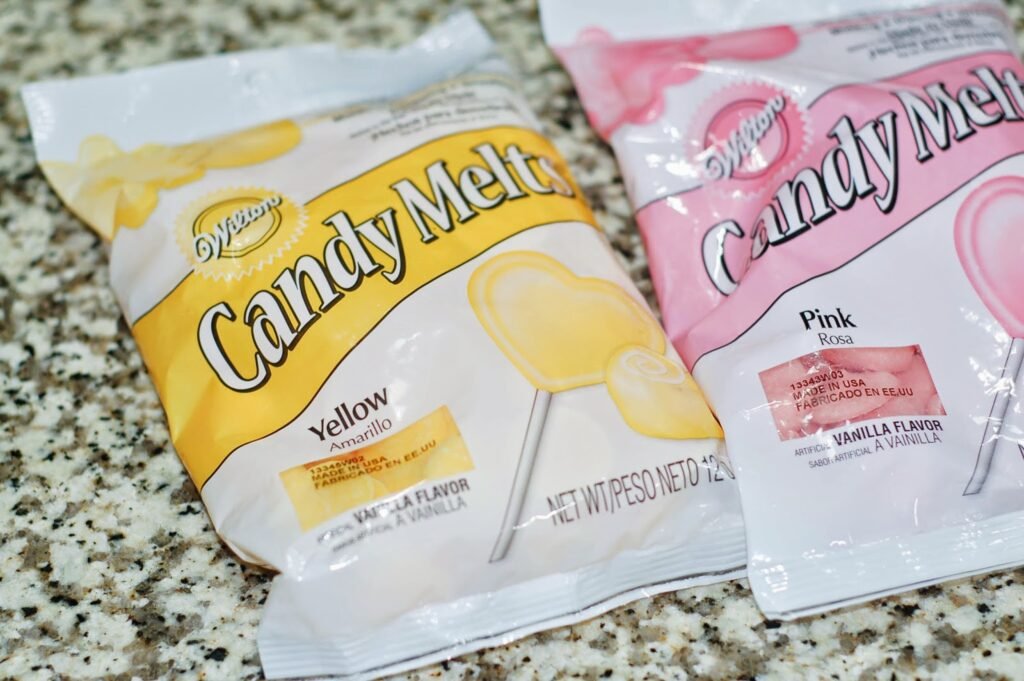
These are the three colors I used, but there are lots of different colors available. I also added some colored sugar crystals which I had in the pantry, to some of the pops. You add the crystals before the candy melt fully sets. Once the candy melt was set, I used a disposable candy decorating bag to pipe on the centers. Usually the candy melt sets fast, but like I said my kitchen was a little warm yesterday so I ended up having to place all my pops in the fridge to get the coating to harden. The weather here has been brutal this week. I also though of using pastel M&Ms for the centers, but I didn’t have any on hand.

To give the flower pops a little more special treatment I placed them in cupcake. You can make any cupcakes you want and add some green frosting, then tint some coconut flakes with some green dye to make it look like grass and adhere them to the frosting. Just place the coconut flakes in a Ziplock bag, add some food coloring and shake it up. This is something the kids can do. Or if you want you can just make the pops and maybe add a cute paper leaf to the lollipop stick with a message. Whatever you do, enjoy your pops and make sure to share!
Biscoff Cookie Dough Pops
by The Sweet Chick
Prep Time: 2 hours
Keywords: no bake biscoff chocolate chips candy melt Mother’s Day pops truffles American spring
Ingredients (52 pops)
For the cookie dough
- 2/3 cup unsalted butter, room temperature
- 2 tablespoons brown sugar
- 1/4 cup granulated sugar
- 1/4 cup Biscoff cookie spread
- 1/2 teaspoon vanilla extract/paste
- 2 teaspoons meringue powder ( I used Wilton’s)
- 2 tablespoons water
- 1 3/4 cups all purpose flour
- 1/2 teaspoon baking soda
- 1/2 teaspoon salt
- 1/2 cup mini chocolate chips
For the candy coating
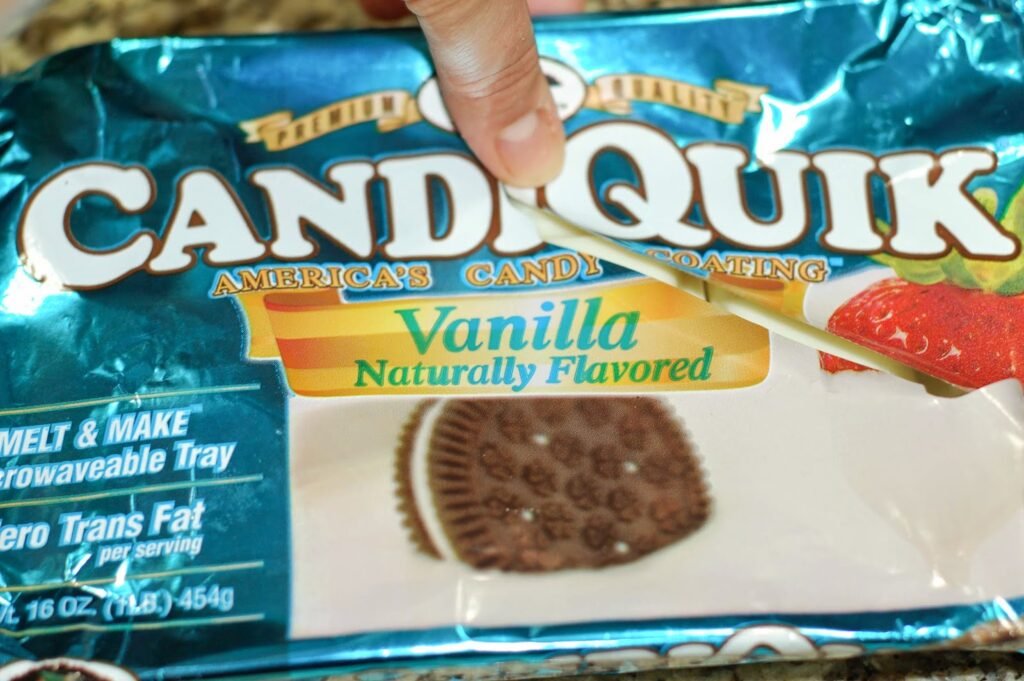
- 1 package (16 oz.) Candiquik Vanilla candy coating (white)
- 1 package (12 oz.) Wilton’s Candy Melt wafers (pink)
- 1 package (12 oz.) Wilton’s Candy Melt wafers (yellow)
Tools needed
- silicone flower pop mold
- 52 lollipop sticks
- 1 box (12) Wilton’s disposable candy decorating bags
Optional toppings
- pink, white, and yellow sugar crystals
Instructions
For the cookie dough
In a stand mixer, cream together the butter and sugars. Then add the cookie spread and vanilla, mix on low until well blended.
In a small bowl mix together the meringue powder and water, then add it to the mixer bowl and mix well.
In a medium bowl combine the flour, baking soda, and salt. Next add it to the mixer bowl a little at a time while mixing on low until dough starts to form.
Last, add the chocolate chips and mix until all incorporated.
Lightly dust your silicone molds with flour, removing any excess.
Add a small amount of cookie dough to each cavity pressing down with your fingers until cavity is full, and making sure the top of the dough is flush to the mold.
Place a Candiquik square in a small microwave safe bowl, and melt in the microwave according to instructions on the package (usually 30 second at a time until fully melted).
Dip the tips of the lollipop sticks into the candy melt, then carefully insert them into the bottoms of the flower. (I place my hand on top of the cookie dough while inserting the sticks to insure they would go in correctly.)
Place the molds in the freezer for 1/2 hour to 1 hour until they are firm enough to pop out of the mold. (I placed the pops in an airtight container and kept them in the freezer until it was time to dip them in the candy melt.)
For the candy coating
Using one color at a time, melt your candy coating in the microwave according to instructions on the package. Make sure your candy coating is not too hot, just warm. (If your candy coating is not smooth, you can add a little bit of vegetable shortening to it, 1/2 teaspoon at a time.)
Remove a small batch of cookie dough pops from the freezer and dip them in the candy melt. Swirl them around upside down a bit to remove any excess candy melt, then place them upright in a pop holder until the candy melt hardens. (I had to place mine in the fridge because my kitchen was a bit too warm that day.)
Repeat process for all pops, using the different colored candy coating.
For the centers of the flower pops, pour melted candy coating into a disposable candy decorating bag with tip cut off and add a small dot of candy coating in the middle. Make sure you candy coating is not too hot, wait for it to be just warm. It will make piping easier and will save you from burning your hands. (If your candy coating hardens up in the bag, just pop it back in the microwave for about 10 seconds or so.)
Once all the candy melt has set, you really don’t need to keep these pops refrigerated. Remember there are not eggs involved. Just keep them in an airtight container.
Optional toppings
If you are using sugar crystals, sprinkle them on before candy melt is completely set.
Enjoy!
Cookie dough recipe adapted from Chocolate Chip Cookie Dough Cake Pops by My Little Cupcake Blog
This recipe may be shared at these fabulous link parties.
Related Posts


Subscribe for New Racipies
Get mental health tips, updates, and resources delivered to your inbox.