
Are Coconut Aminos Acidic? Coconut Aminos and Acid Reflux

Medically reviewed by Aneeza Pervez Updated Date: January 1, 2026
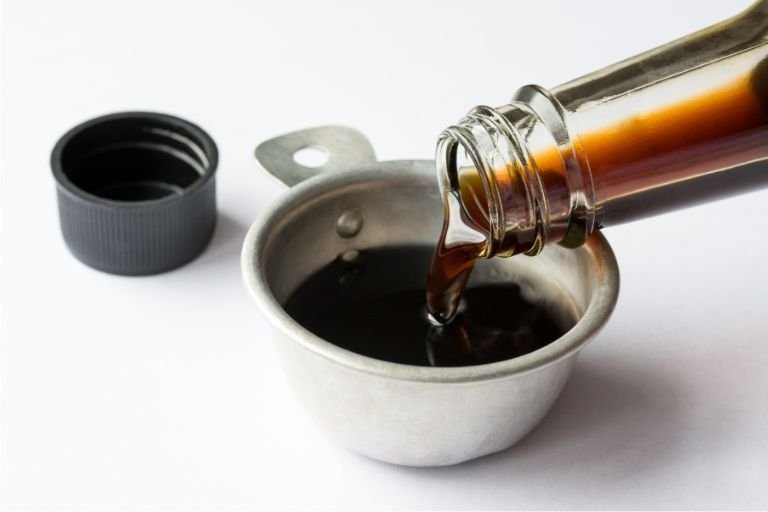
Introduction to Coconut Aminos and Digestive Health
Coconut aminos is a popular soy sauce alternative made from the fermented sap of coconut palm and sea salt. Known for its mild, slightly sweet flavor, it’s a go-to condiment for individuals avoiding soy or gluten. While it offers a healthier alternative to traditional soy sauce, those with acid reflux or GERD (gastroesophageal reflux disease) may wonder if coconut aminos are acidic and how they affect digestion.
This article explores the acidity of coconut aminos, its impact on acid reflux, and how to incorporate it into a reflux-friendly diet.
Nutritional Profile of Coconut Aminos
Coconut aminos is a low-calorie condiment with a range of health benefits. A typical serving of 1 teaspoon provides:
- Calories: 5
- Carbohydrates: 1 gram
- Sodium: 90–130 mg, depending on the brand (less than soy sauce).
- Amino Acids: Contains several amino acids essential for protein synthesis and cellular repair.
Coconut aminos is free from gluten, soy, and MSG, making it suitable for those with dietary restrictions or sensitivities.
Is Coconut Aminos Acidic or Alkaline?
Acidity of Coconut Aminos
Coconut aminos is slightly acidic, with a pH ranging between 4.5 and 5.5. While it is less acidic than traditional soy sauce (pH 4.4), it still falls on the acidic side of the pH scale due to the fermentation process.
Why It’s Often Reflux-Friendly?
Despite its mild acidity, coconut aminos is generally considered gentler on the digestive system compared to soy sauce. Its lower sodium content and lack of added chemicals or preservatives make it a better choice for individuals managing acid reflux.
Coconut Aminos and Acid Reflux
Does Coconut Aminos Trigger Acid Reflux?
For most individuals, coconut aminos is unlikely to trigger acid reflux. Its mild acidity and lower sodium levels make it less irritating to the stomach and esophagus than traditional condiments like soy sauce or vinegar-based dressings. However, overconsumption or sensitivity to acidic foods may still cause discomfort in some cases.
Potential Benefits for Acid Reflux
According to the research, following are the health benefits of coconut aminos:
- Lower Sodium Content: High sodium levels in traditional soy sauce can lead to water retention and bloating, which may worsen reflux symptoms. Coconut aminos has less sodium, making it a gentler alternative.
- Free from Common Triggers: Unlike soy sauce, coconut aminos is free from gluten, soy, and MSG, which can irritate the digestive system.
- Natural Fermentation: The fermentation process of coconut sap produces beneficial compounds that may support gut health and digestion.
How to Safely Include Coconut Aminos in a GERD-Friendly Diet?
To enjoy the benefits of coconut aminos without triggering acid reflux, follow these tips:
Use in Moderation
Stick to small amounts (1–2 teaspoons per meal) to prevent overloading your stomach with acidic or salty foods.
Pair with Alkaline Foods
Combine coconut aminos with low-acid or alkaline foods like quinoa, leafy greens, or steamed vegetables to balance the meal’s acidity.
Avoid Cooking at High Temperatures
Heating coconut aminos at high temperatures can intensify its saltiness and alter its flavor, which might irritate sensitive stomachs.
Check the Ingredients
Choose pure coconut aminos without added preservatives, artificial flavors, or extra sweeteners that could exacerbate reflux symptoms.
Author Tip: 7 Kinds of Foods to Avoid with GERD
Coconut Aminos vs. Soy Sauce for Acid Reflux
| Feature | Coconut Aminos | Soy Sauce |
| pH | 4.5–5.5 | 4.4 |
| Sodium (per tsp | 90–130 mg | 290–320 mg |
| Gluten-Free | Yes | Only if labeled gluten-free |
| Soy-Free | Yes | No |
| Reflux-Friendly | More tolerable | Less tolerable |
Coconut aminos is the better choice for individuals with acid reflux due to its lower acidity and sodium content.
Reflux-Friendly Recipes with Coconut Aminos
Vegetable Stir-Fry
- Ingredients: Steamed broccoli, carrots, snap peas, and 1 teaspoon of coconut aminos.
- Preparation: Sauté the vegetables lightly with coconut aminos for a flavorful, reflux-friendly dish.
Coconut Aminos Marinade
- Ingredients: 2 teaspoons coconut aminos, 1 teaspoon olive oil, and a pinch of garlic powder.
- Preparation: Use as a marinade for lean proteins like chicken or fish, avoiding acidic additions like lemon juice.
Salad Dressing
- Ingredients: Coconut aminos, olive oil, and a dash of honey.
- Preparation: Mix well and drizzle over a spinach or cucumber salad for a gentle, reflux-safe dressing.
Author Tip: Are Salads Healthy?
Tips for Managing Acid Reflux
In addition to incorporating coconut aminos, follow these tips for managing acid reflux effectively:
- Eat Smaller, More Frequent Meals: Large meals can increase stomach pressure and trigger reflux.
- Stay Upright After Eating: Wait at least 2–3 hours before lying down to prevent acid backflow.
- Avoid Known Triggers: Limit spicy, fatty, or highly acidic foods like citrus, tomatoes, and alcohol.
- Elevate Your Bed: Use a wedge pillow or raise the head of your bed to reduce nighttime reflux.
- Stay Hydrated: Drink water throughout the day to support digestion, but avoid drinking large amounts during meals to prevent bloating.
Author Tip: 7-Day Meal Plan For Gastritis
Conclusion
Coconut aminos is a slightly acidic condiment that is generally well-tolerated by individuals with acid reflux when consumed in moderation. Its lower sodium content, absence of common triggers like soy and gluten, and mild flavor make it a suitable alternative to traditional soy sauce. By pairing it with alkaline foods and following reflux-friendly practices, you can enjoy the benefits of coconut aminos without discomfort.
FAQs
Is coconut aminos acidic or alkaline?
Coconut aminos is mildly acidic, with a pH of 4.5 to 5.5.
Can coconut aminos trigger acid reflux?
For most people, coconut aminos is less likely to trigger reflux compared to soy sauce due to its lower acidity and sodium content.
How much coconut aminos can I consume with GERD?
Stick to small servings, about 1–2 teaspoons per meal, to avoid overloading your stomach with acidity.
Is coconut aminos better than soy sauce for acid reflux?
Yes, coconut aminos is generally better tolerated because it has less sodium, no soy, and a slightly higher pH.
Can coconut aminos be included in a low-acid diet?
Yes, when used in moderation and paired with alkaline foods, coconut aminos can be part of a low-acid diet.
Related Posts



Subscribe for New Racipies
Get mental health tips, updates, and resources delivered to your inbox.
Apricot Raspberry Galette, Or Look What I Made!

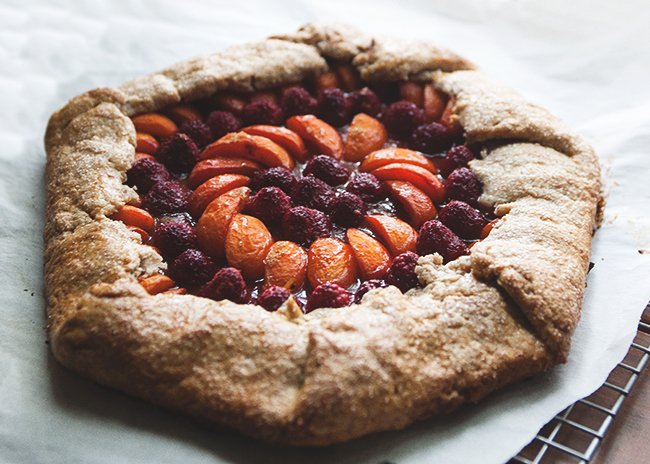
Under Elisabeth Prueitt’s tutelage, I feel invincible.
She’s the co-founder of Tartine Bakery in San Francisco, head pastry chef, and, purveyor of all things baked and sweet and wonderful. Along with her husband Chad Robertson, they’ve turned Tartine into something of an institution. This is a widely-acknowledged fact. Even if institutions are generally quite a bit older than the 10 years that this bakery’s been around. Anyway, I’m sure many of you savvy cooks and bakers have heard of it, so I won’t wax any more poetic except to say that the almond croissants are SO SO good.
Instead, I meant to give you a recipe for an apricot raspberry galette.
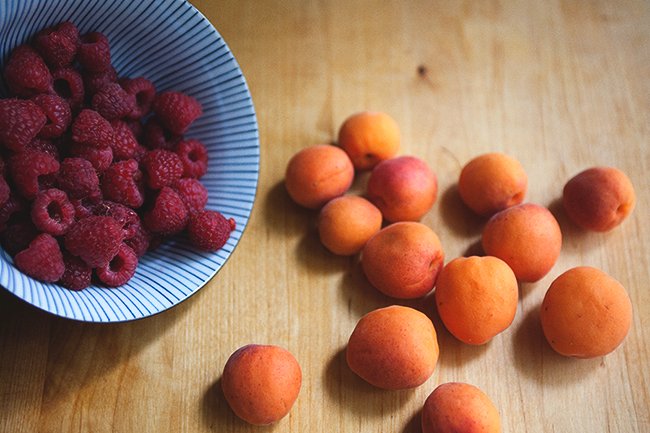
I’ve always been charmed by galettes; they’re so endearing and sweet, homely little things brimming with the fresh and organic. At the same time, I’ve always been intimidated by the idea of making the crust—tart doughs seem such fickle things. So in undertaking this recipe, I knew that I wanted to turn to Prueitt’s cookbook Tartine… she’s never led me astray, you see.
She describes galettes as “quintessentially beautiful rustic tarts… they are very satisfying to make.” I wanted to grasp satisfying! More than that, I wanted to feel the gratification that comes from sinking my teeth into something substantial. I wanted to feel the flour and butter between my fingers, build something lovely and wholesome completely out of scratch. The process of baking, of creating really, is never as palpable as when you’re getting your hands (and in my case, feet) dirty, smearing butter everywhere, flexing those arm muscles rolling and lifting and pleating. It’s a rewarding feeling.
So I took out the rolling pin—we don’t see much of it these days—and began the painstaking process of flattening frozen butter into long thin strips in flour. Which came together into something that resembled dough. Which came together into something that resembled a free-formed tart. And when it came out of the oven, I was astonished to find a galette. It came out rustic indeed. Seven-sided, lopsided, shriveled fruit and all, I loved it upon sight. Because I’d made it from scratch.


APRICOT RASPBERRY GALETTE
Fruit Galette recipe in Tartine by Elisabeth Prueitt & Chad Robertson
Makes 1 large galette or 6 mini galettes
Ingredients:
For dough:
1 cup (2 sticks) unsalted butter, very cold
1/2 cup water
3/4 tsp salt
1 cup rye flour
1-1/2 cups all-purpose flour (or use all all-purpose if you’d like)
For filling:
3 cups fruit (berries, stone fruit, sauteed apples or pears, etc.)
2 to 4 Tbsp brown or granulated sugar
Lemon juice if needed
Egg wash:
1 large egg yolk
1 Tbsp heavy cream
Granulated sugar for sprinkling
Directions:
Cut the butter into 1-inch cubes and put them in the freezer. Measure the water, dissolve the salt into it, and put it into the freezer. Chill both the butter and the water for about 10 minutes.
Measure the flour onto your work surface and spread it into a rectangle about 1/3 inch deep. Don’t worry about mixing it, as it’ll get mixed in the process. Scatter the butter cubes over the flour and toss some flour over them so they don’t stick to your rolling pin. Begin rolling. When the butter starts flattening into long, thin strips, use a bench scraper to scoop up the sides so it’s about the same size as when you started. Repeat this rolling and scraping 3 to 4 more times.
Make a well in the center and pour in the cold water. With the bench scraper, scoop the sides of the dough into the center, mixing the water and flour in a cutting motion. Keep scraping and cutting until the dough is shaggy, then shape it into a rectangle about 10 by 7 inches. Dust the top lightly with flour. Roll out the flour until it’s about half as thin, then scrape all four sides back to its original shape and reroll. Repeat this a few more times until your dough is smooth, cohesive. You should end up with a 10 by 7 inch rectangle.
Transfer the dough to a large baking sheet, cover it with plastic wrap, and chill for about 1 hour.
While the dough is chilling, prepare your fruit. Peaches can be sliced into eighths, apricots quartered.
When the dough is chilled, you can divide it into six equal parts at this point. Roll the dough into a rough circle of about 14 inches in diameter if making a single galette or 6 to 7 inches if making mini galettes. (Prueitt gives lengthy instructions on how to do this, but for the sake of not being too fussy, I won’t go into details) Transfer the circle/s to a baking sheet and chill about 10 minutes.
Fill the center of each circle with fruit, leaving a 2-inch border if making a large galette, or a 1-inch border if making small. At this point, taste the fruit to decide how much sugar you want to sprinkle on top, anywhere from 2 to 4 Tbsp on the large galette or 1 to 2 tsp on each small galette. If you want, squeeze some lemon juice on top. Fold in the sides into that classically gorgeous galette shape, making sure to seal crevices where the juice can leak out. Chill for about 10 minutes, and start preheating the oven at 375 degrees F.
At this point, Prueitt says you can store them in the fridge, unwrapped, for a few hours or wrap them airtight and store them in the freezer for up to 2 weeks. Otherwise, make your egg wash by whisking together the cream and egg yolks. Brush the egg wash on the pastry edges and sprinkle them with granulated sugar.
Bake the galettes until the crust has visibly puffed and baked to a dark brown and the fruit juices are bubbling, 45 to 60 minutes for the large galette and 40 to 50 minutes for the small. Rotate halfway through for even browning. (If baking them straight from the freezer, tack on about 10 minutes to the baking time.) Remove from the oven and serve immediately, or let it cool and serve warm or at room temperature.
Related Posts



Subscribe for New Racipies
Get mental health tips, updates, and resources delivered to your inbox.