Don’t Think Fat, Think Pork Belly: Dongpo Pork
Though my sister and I were never picky eaters, my mom had to apply her persuasion skills every now and then to get us to eat the food she’d prepared. Every parent must have to figure out an angle, some way of coaxing their child into eating the undesirable, or else dinner quickly descends into an unpleasant affair.
My mom appealed to our vanity. Everything was “good for the skin”—tomatoes gave you a rosy blush, tofu made it silky. And pork belly, well, apparently the fat operated as some kind of lubricant, turning your skin soft and plush. She also insisted that what we were eating wasn’t fat, just the extremely thick epidermis of the pig.
C’mon.
I wasn’t stupid, even at the grand age of ten. But it wasn’t like I needed the prodding anyway. I loved meat, especially pork belly. Although I never registered that what I was eating was pork belly. You don’t think about such things when you’re a kid. It was only later, now, that I realize what cut of meat my mom constantly cooked.

I’m not going to lie, dongpo pork is really fatty. But that’s what makes it so good! Pork belly is used a lot in Chinese cooking: twice-cooked pork (my dad’s favorite), red-braised pork (my sister’s favorite), and dongpo pork. I was reminded of the prevalence of pork used in Chinese cooking while going through all these recipes—the Chinese character for meat usually signifies pork unless otherwise noted.
I never knew the origin story of this dish, but it’s actually named after the Chinese poet Su Dongpo, who apparently was banished to Hangzhou, then considered the boondocks I guess, to lead a life of poverty. He was a great chef, and actually invented dongpo pork as he was trying to improve on red-braised pork.
As the meat braised, it filled the apartment with the fragrant smell of Shaoxing wine… and made me feel slightly homesick. So I called my mom to tell her what I was doing, and you know what her response was? “Don’t eat too much of it! It will raise your cholesterol!”
C’mon, Mom. It’s good for my skin, remember?


DONGPO PORK, a.k.a. BRAISED PORK BELLY
Adapted from Maameemoomoo
Serves 4
Ingredients:
1.5 lb. pork belly
1 Tbsp canola oil
2 scallions, chopped into 1-inch pieces
3 cloves garlic, peeled
3 Tbsp rock sugar or brown sugar
3 Tbsp soy sauce
3.5 cups lukewarm water
3 cups boiling water
1.5 Tbsp dark soy sauce
1/2 cup shaoxing wine
1 Tbsp cornstarch
Directions:
In a wok on medium heat, add oil. Saute scallions, ginger and garlic for 2-3 mins until fragrant. Add sugar and further saute until sugar starts to melt. Add soy sauce, dark soy and wine. Bring to a boil. Once boiling, turn off heat and add lukewarm water. Set aside.
While sauce is coming to a boil, slice pork belly into pieces about 2 inches thick. Place pork belly pieces on a chopping board or a baking pan and scald them on all sides with boiling water.
Place the pork pieces skin side down in a pan large enough to fit all the pieces together and add the earlier sauce mixture. Bring to boil. Once boiling, turn down the heat to a low simmer and braise the pork for 30 mins, covered. After 30 minutes, flip the pork belly pieces over and continue braising, covered, for a minimum of 3 hours, basting the skin occasionally.
When ready, remove pork belly pieces gently and set aside. Strain remaining sauce into a saucepan and bring to a low simmer. Mix cornstarch with 1/4 cup water and gently pour it into the sauce. Stir well until sauce becomes a shiny, sticky glaze. Turn off heat. To serve, gently place the pork belly onto a plate and spoon the sauce over. Serve with rice or noodles (my favorite!).
M&M; Birthday Party

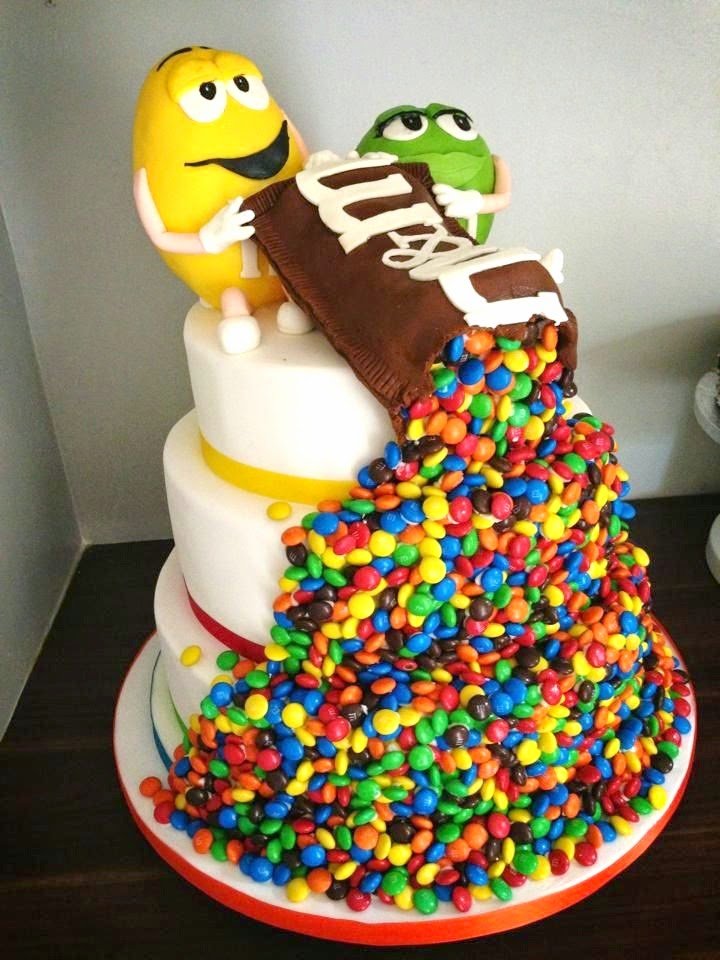
I put together my son’s 4th birthday party last week. He’s into a lot of things, but nothing in particular stood out as a theme. That is until someone posted a photo of an M&M wedding cake on Facebook. I had my inspiration. My son loves M&M’s in all different varieties. He devours whatever flavored M&M’s I buy to make recipes with. He’s not picky when it comes to his favorite candy. So I researched Pinterest for DIY party decor and kept my eyes open when I was out shopping. I tried to keep it simple because it wasn’t going to be a terribly big party, but I wanted it to be special for him.
I put together my son’s 4th birthday party last week. He’s into a lot of things, but nothing in particular stood out as a theme. That is until someone posted a photo of an M&M wedding cake on Facebook. I had my inspiration. My son loves M&M’s in all different varieties. He devours whatever flavored M&M’s I buy to make recipes with. He’s not picky when it comes to his favorite candy. So I researched Pinterest for DIY party decor and kept my eyes open when I was out shopping. I tried to keep it simple because it wasn’t going to be a terribly big party, but I wanted it to be special for him.

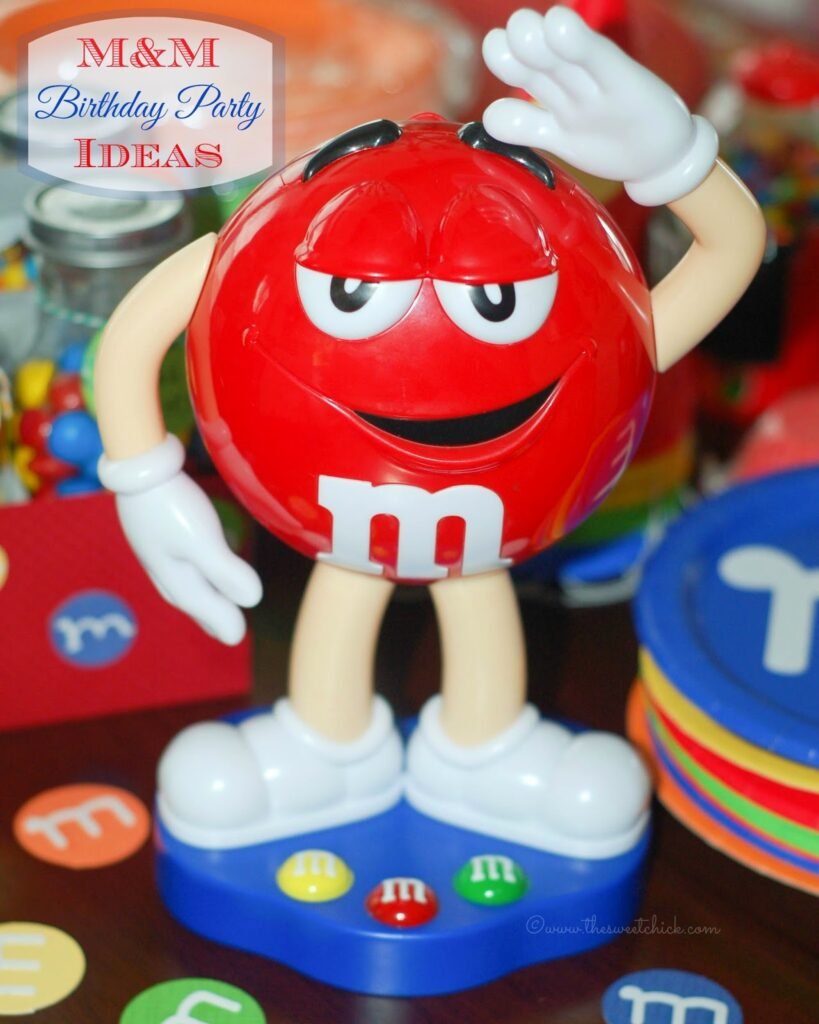
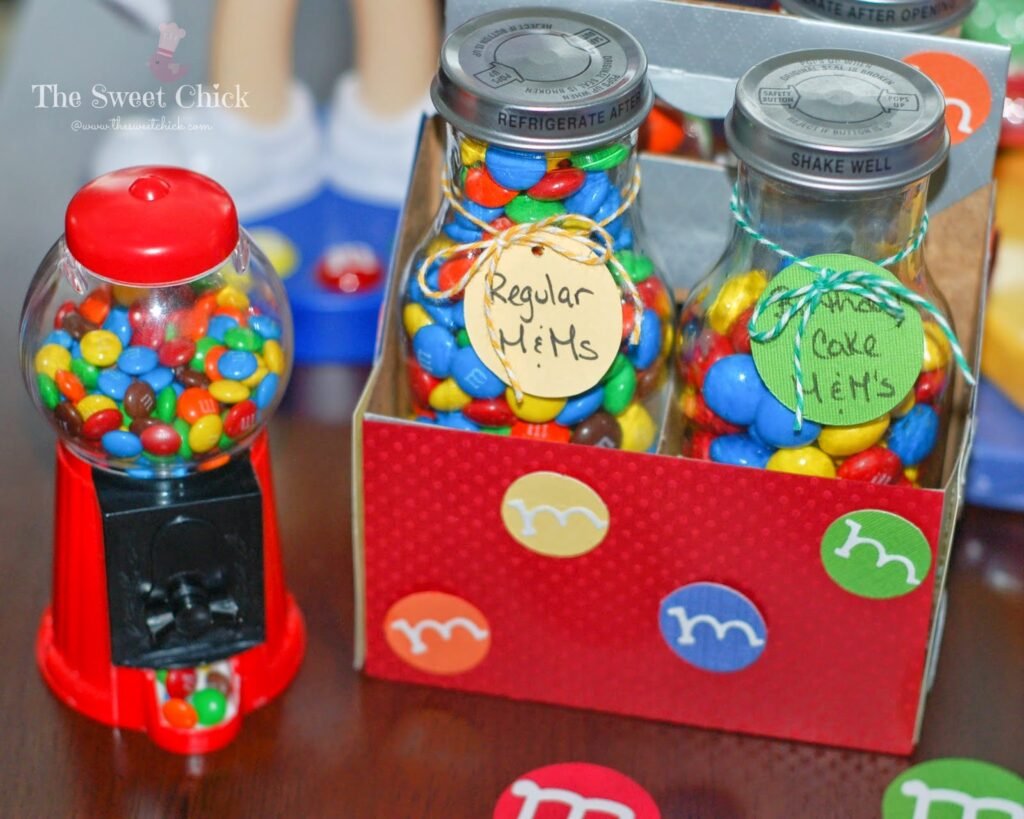
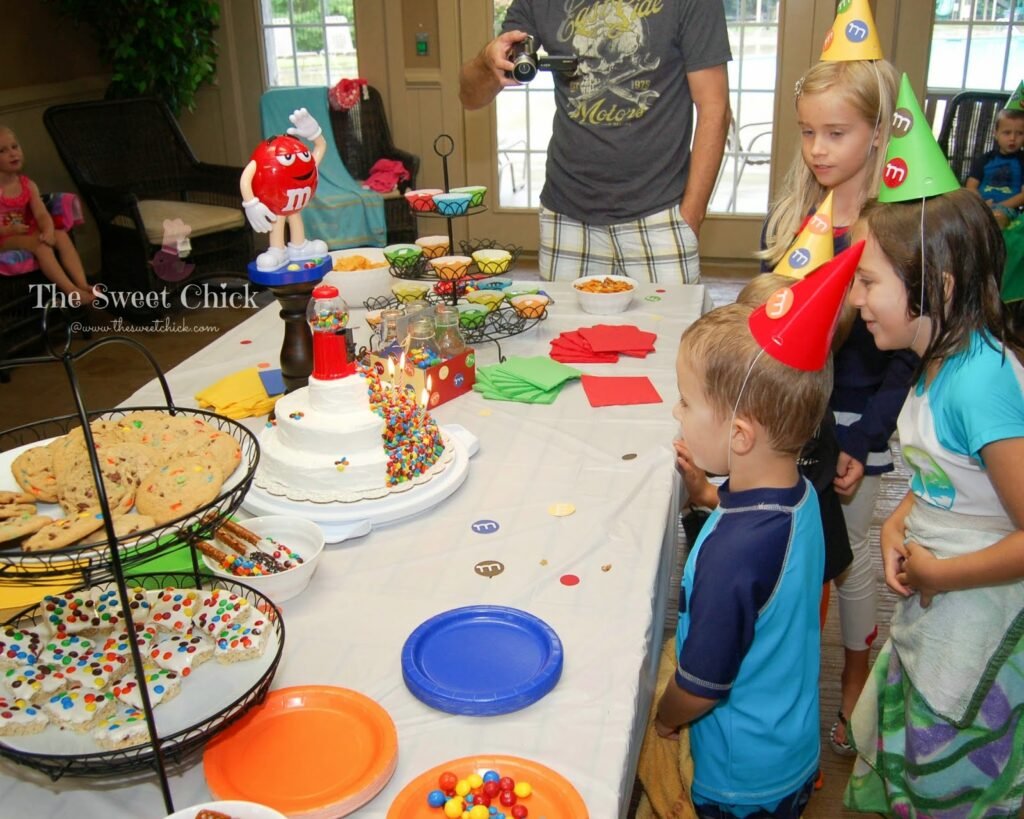
The first thing I had found was 10 inch red plastic M&M dispenser at CVS pharmacy. I used that as my centerpiece. It was too cute to pass up. Then I found a small 5 inch plastic bubble gum machine at Toys R Us that I used as a cake topper.
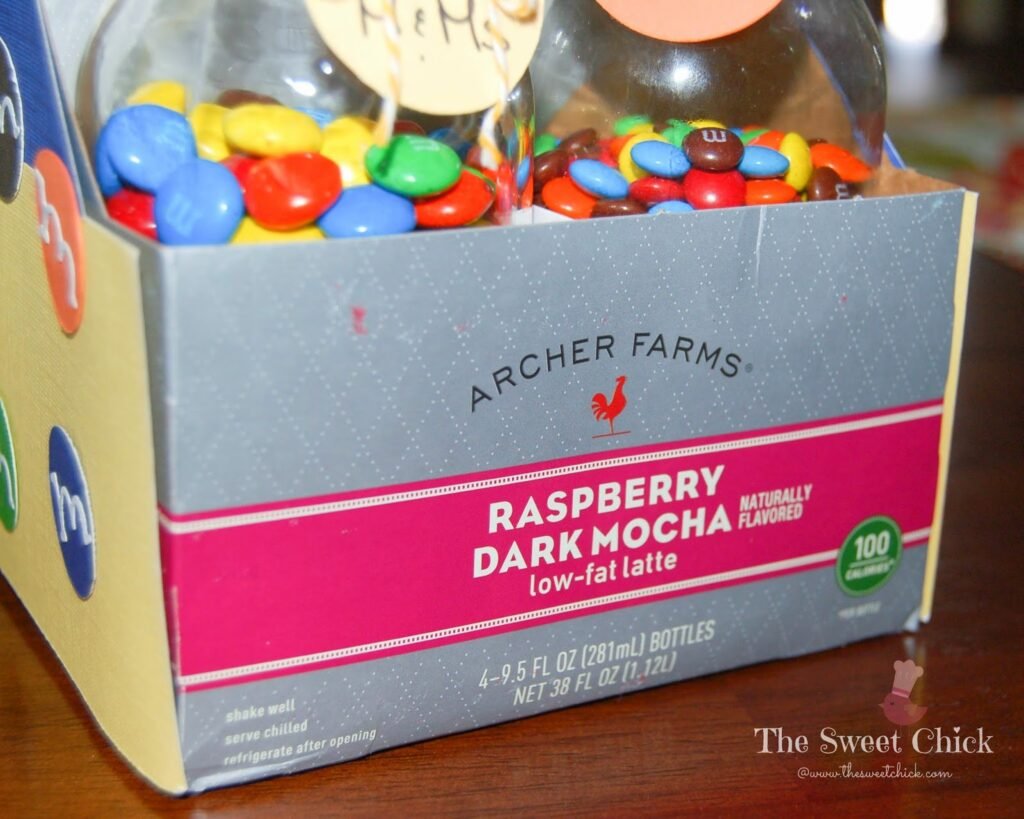
I wanted the party goers to have a selection of M&M’s to choose from, so I decorated a Archer Farms carton with some card stock I had on hand. I cut out some circles with my Fiskars ShapeCutter Template, then embellished it with little “m’s” I cut out with my Sizzix Sizzlets dies in the Bounce font (which apparently they don’t make anymore, my scrapbook tools are now antiques). I added some circle tags to label the M&M flavors.
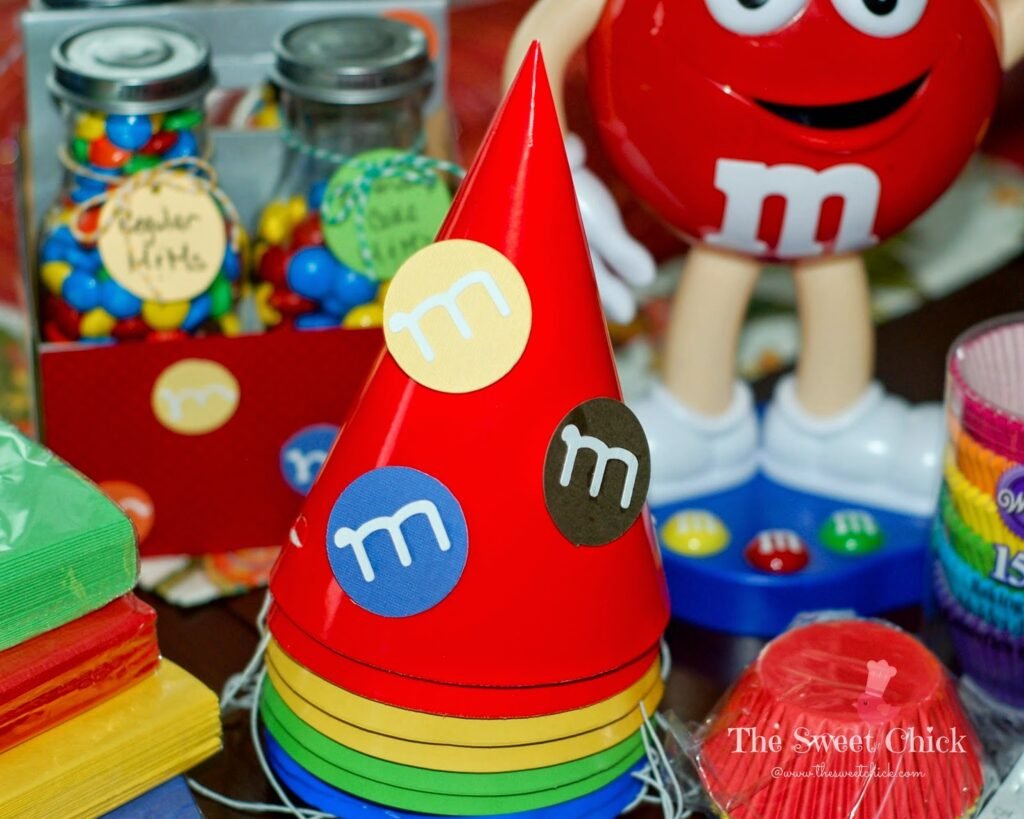
I found most of my other supplies at Walmart. I bought plates, napkins, and party hats in all the M&M colors (except brown). I jazzed up the plain party hats with some more cut outs. For these “m’s”, I used my Cricut machine with the Tear Drop cartridge. I was trying to use what I had on hand. If you want the official “M”, you can find it on the Cricut Plantin SchoolBook cartridge.
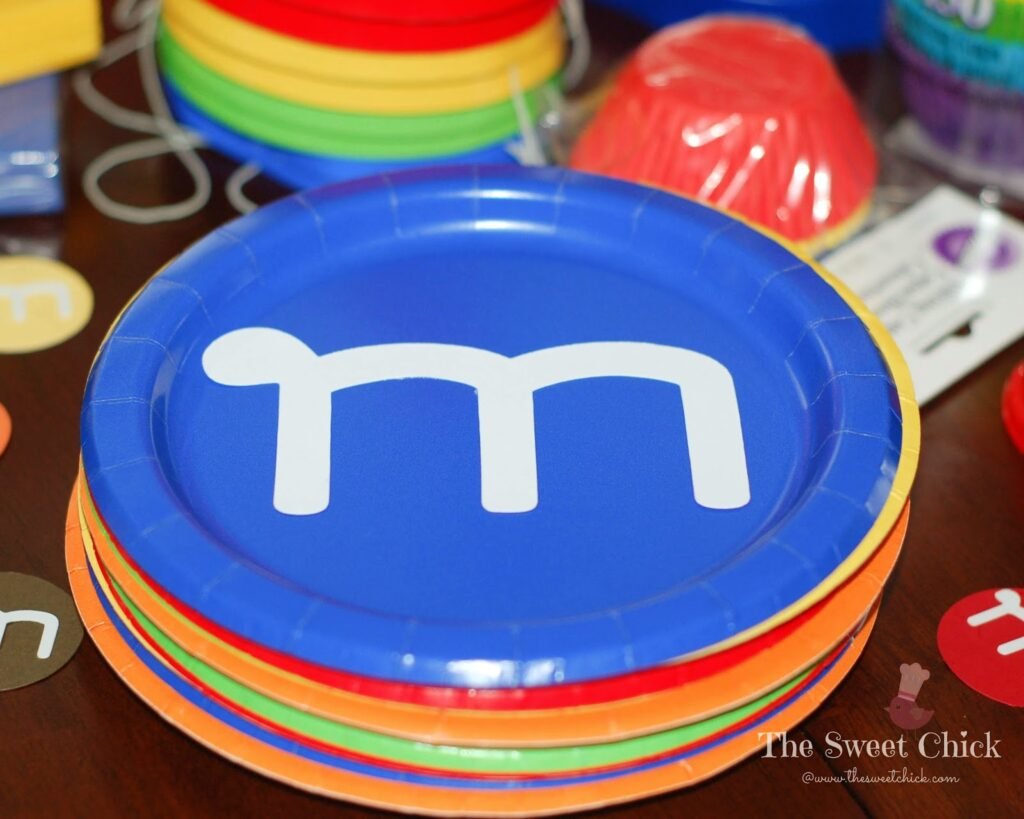
I used my Cricut machine to cut out these big “m’s” also. This was one of the ideas I found on Pinterest for wall decorations. I used double stick tape to keep them up.
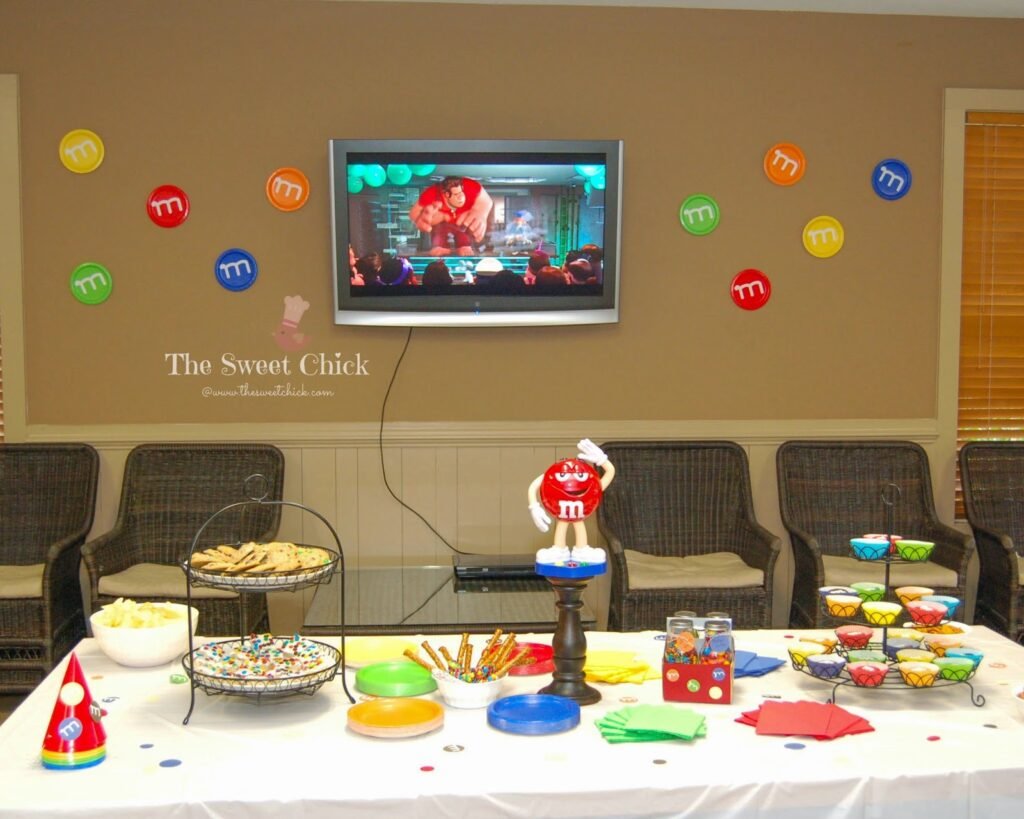
He’s the whole thing all together. Simple, but colorful and fun. It was raining outside, so we played some movies for the kids, but they didn’t care, they ended up going in the pool anyway.

I made all sorts of treats to go with the theme, Chocolate Chip M&M Cookies, M&M Rice Krispie Treats, M&M Pretzel Sticks, and more.
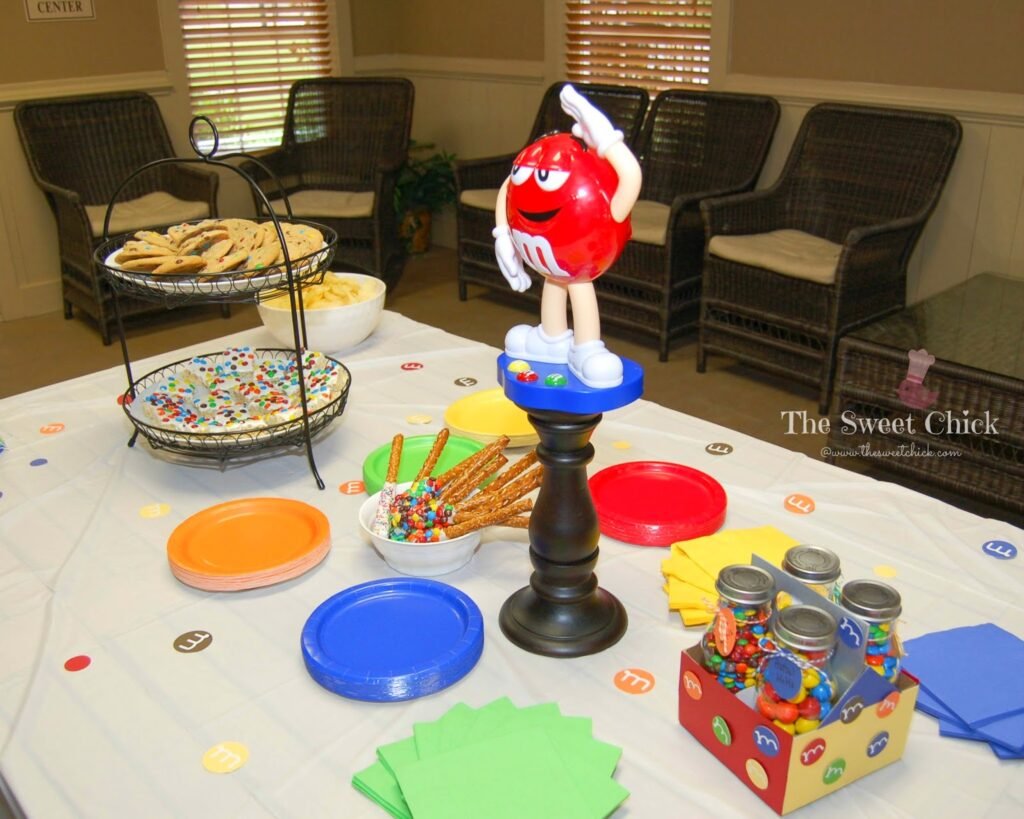
I use the extra “M’s” I cut out to decorate the table. I placed the M&M dispenser on a candlestick holder I had to make him more prominent.
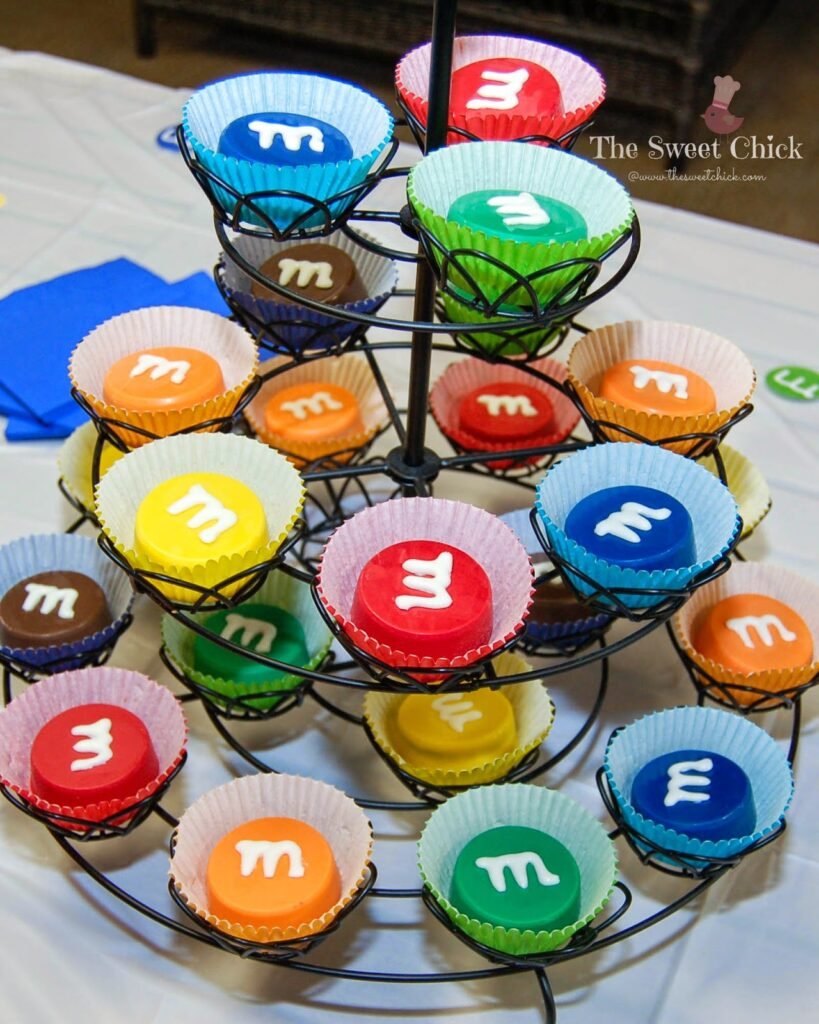
Here are the Candy Coated Oreo M&M’s I blogged about earlier this week. I placed each in matching cupcake liners from Wilton that I had found at Walmart.
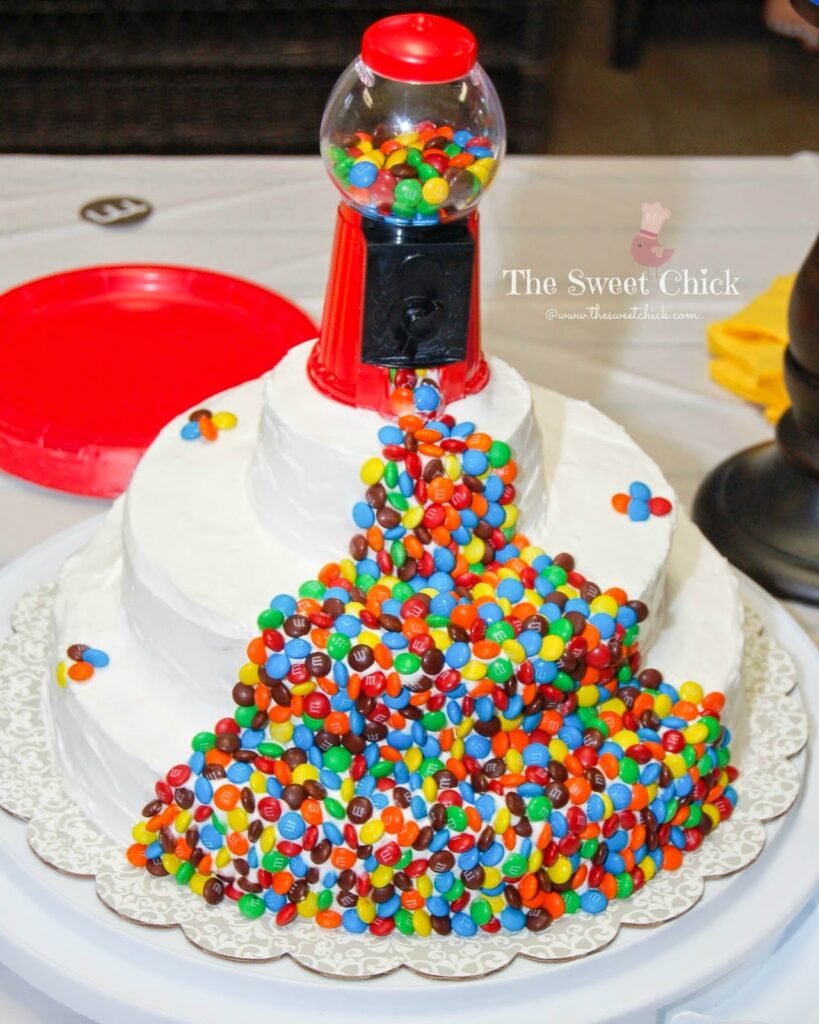
This is the cake I made, inspired by this one below. The kids thought it was amazing. Mission accomplished.
Here’s the birthday boy all smiles when he saw his cake. He was excited by all the mini M&M’s pouring down the front. All the kids wanted a slice with the M&M’s on it.

The cake was just two Pillsbury Funfetti cake mixes and two cans of Betty Crocker Fluffy White frosting. I knew I would be spending all my time perfecting the decorating, so I didn’t make the cake and frosting from scratch this time. Plus, I really love Funfetti cake. And if you are wondering if I place each M&M individually on the cake , the answer would be YES! My husband thought I was nuts. He said I should just throw them on there, but I am a type A personality and everything has to be perfect.
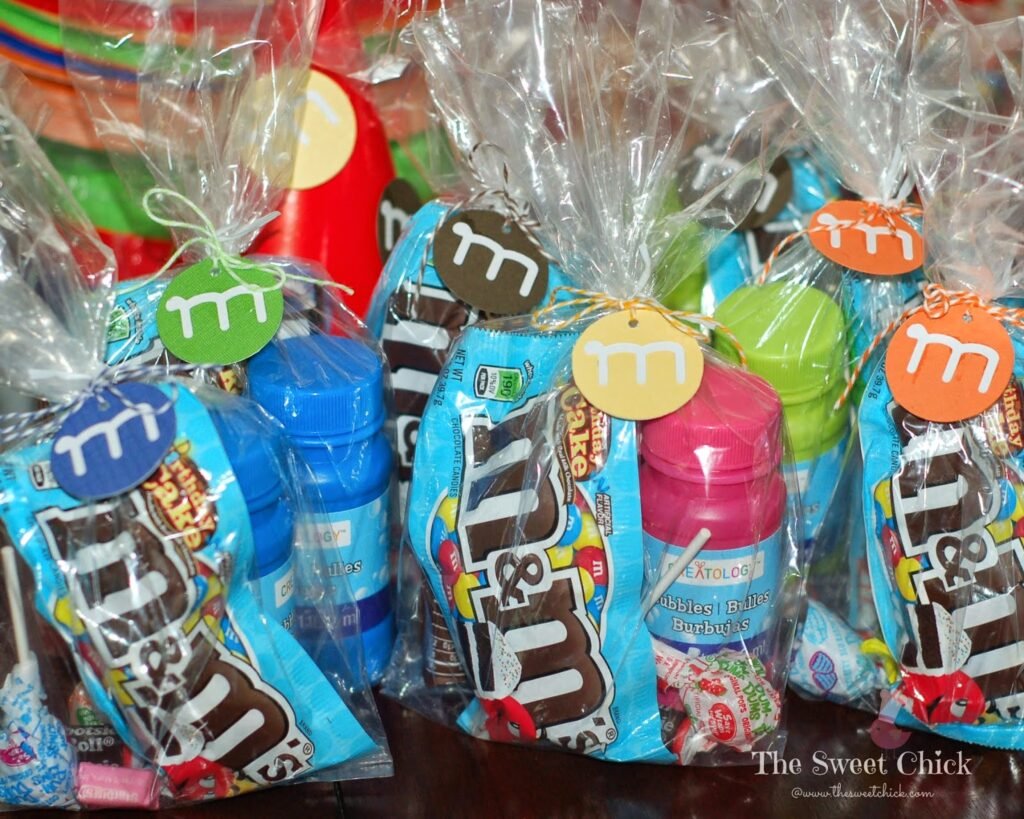
For the favor bags, I bought individual packs of Birthday Cake M&M’s and added some bubbles and other candies. The clear bags are from Walmart and the tags I made myself. I put all the kids names on the back. I attached the tags with matching bakers twine I had on hand.
It was a lot of work, but I like being creative. The looks on the kids faces said it all, it was worth it.