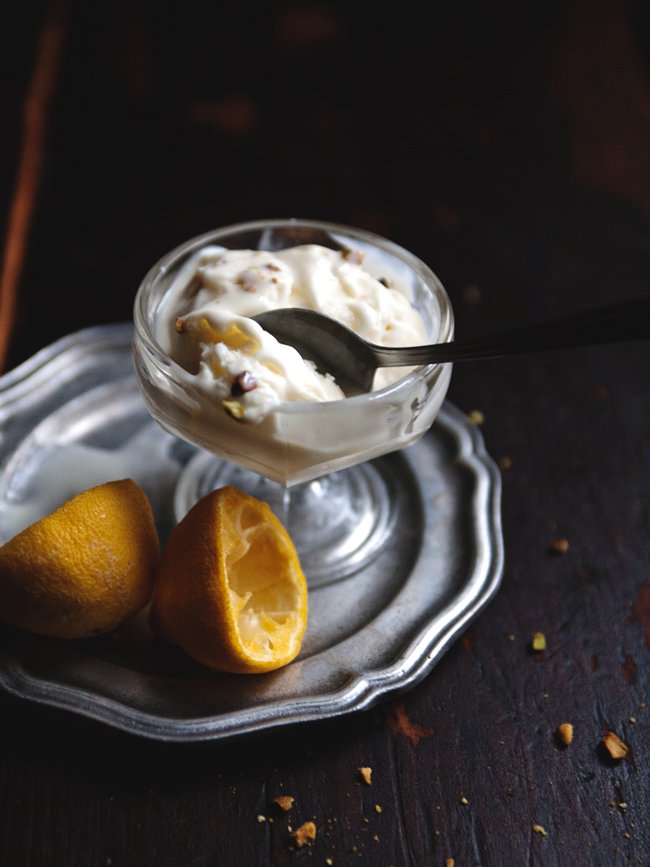
Lemon Frozen Yogurt, à la Jeni’s Splendid Ice Cream
A couple weeks back, I mentioned how I got to try Jeni’s Splendid Ice Cream for the first time ever. And while the famous salted caramel was lip-smackingly good (intensely salty AND sweet), I couldn’t stop thinking about the lemon and blueberry fro-yo, particularly because of the lemon frozen yogurt base. It was tangy and delicate, falling just short of palate-cleansing because it was still quite creamy.
So even though it’s not really frozen desserts weather anymore (oh hell, who am I kidding? I could eat frozen desserts any time of the year (although I think that claim’s actually going to be tested this winter (and are parentheses within parentheses within parentheses grammatically incorrect?))), I couldn’t wait until next year to try out this recipe.
Like Molly said, the recipe’s a bit fussy. It requires very exact timing and the use of many many bowls. And I didn’t even make the blueberry swirl because I wanted the unadulterated taste of lemon. But I didn’t mind it—following directions gets to be kind of meditative after awhile. Just know that you’ve been warned, if you decide to go through with it.
If you follow the directions precisely—ROOM TEMPERATURE cream cheese! I can’t stress that enough—you will most certainly end up with a lovely quart of fro-yo in the lightest shade of yellow. It doesn’t turn icy even after it’s been in the freezer for a few days, it doesn’t melt too fast (or too slow for that matter). It really is the perfect way to savor Jeni’s at home.

LEMON FRO-YO
Recipe from Jeni’s Splendid Ice Creams at Home via Orangette
Yields over a quart
Ingredients:
For the lemon syrup:
2 to 4 lemons
3 Tbsp sugar
For the frozen yogurt base:
1 quart plain low-fat yogurt
1-1/2 cups whole milk
2 Tbsp corn starch
2 oz. (4 Tbsp) cream cheese, softened
1/2 cup heavy cream
2/3 cup sugar
1/4 cup light corn syrup
Zest from one lemon, reserved from lemon syrup
Directions:
One day in advance, Put a mesh sieve lined with 2 layers of cheesecloth over a bowl and pour the plain yogurt into the sieve. Cover with plastic wrap and refrigerate 6 to 8 hours (I kept it in the fridge for over 24 hours and it turned out fine).
For the lemon syrup, first use a vegetable peeler to peel the zest off one lemon in long strips. Reserve for the frozen yogurt base. Then juice enough of the lemons to yield 1/2 cup. Combine the lemon juice and sugar in a small saucepan and bring to a boil over medium-high heat, stirring to dissolve the sugar. Remove from heat and set aside to cool.
For the frozen yogurt:
Remove the plain yogurt from the fridge and measure out 1-1/4 cups worth. Set aside.
Combine 2 Tbsp of the milk in a small bowl with the corn starch.
In a bowl (that will eventually need to fit the entire fro-yo base), whisk the cream cheese until smooth (very smooth! The cream cheese should definitely be at room temperature or it will whisk into clumps).
Combine the remaining milk, heavy cream, sugar, corn syrup, and strips of lemon in a large pot (Jeni specifies a pot with 4-quart capacity, but I really don’t think it’s necessary for this particular recipe. A large-ish pot will do). Bring to a rolling boil over medium-high heat and boil for exactly 4 minutes. Towards the end of the 4 minutes, whisk the corn starch and milk until it’s a smooth slurry. Remove the pot from the heat and slowly whisk in the corn starch mixture. Return the pot to the heat, and continue to cook, stirring consistently, for 1 more minute, until the liquid starts to thicken. Remove from heat, and gradually whisk the milk mixture into the bowl with the cream cheese until smooth. Add the reserved 1-1/4 cup plain yogurt and the lemon syrup. Whisk until smooth.
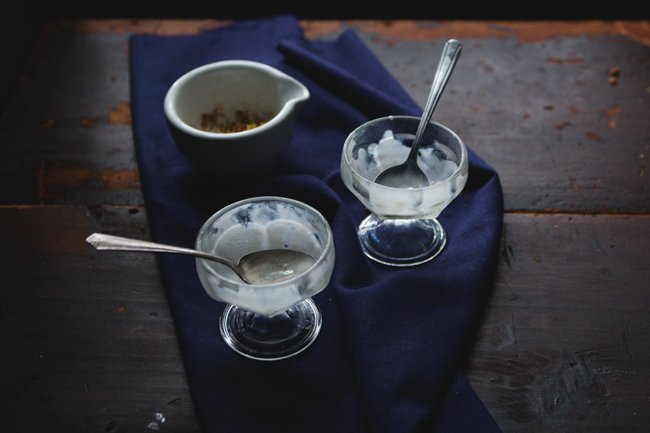
Let cool, then refrigerate the mixture for about 6 hours. Remove from fridge, pick out the strips of lemon (you could pour the mix through a sieve, but it’s quite thick and unmanageable at this point). Pour the mixture into the canister of an ice cream machine, and spin until thick and creamy.
Once done churning, pour the fro-yo in a container and refrigerate it until firm.
M&M; Birthday Party

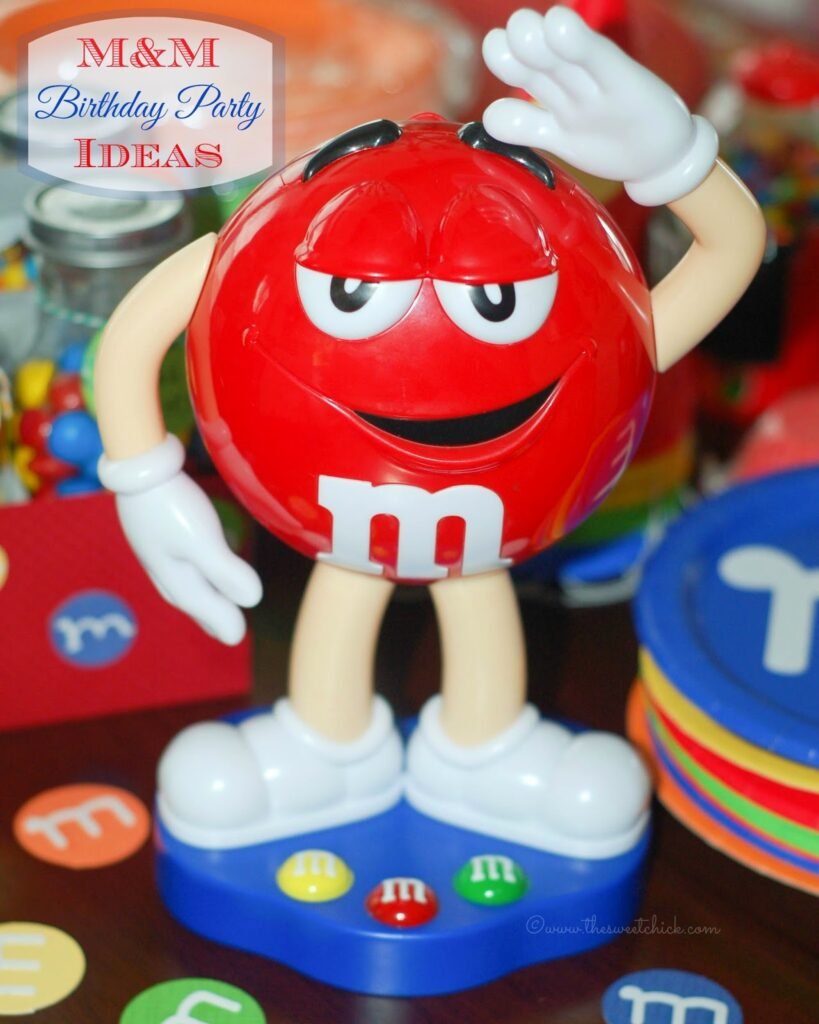
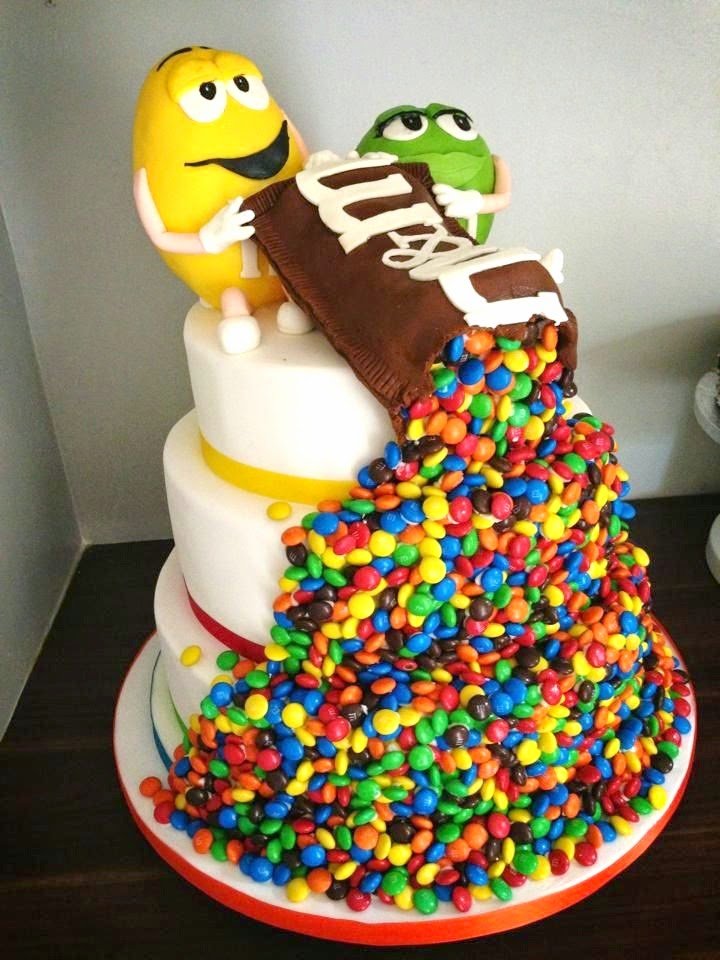
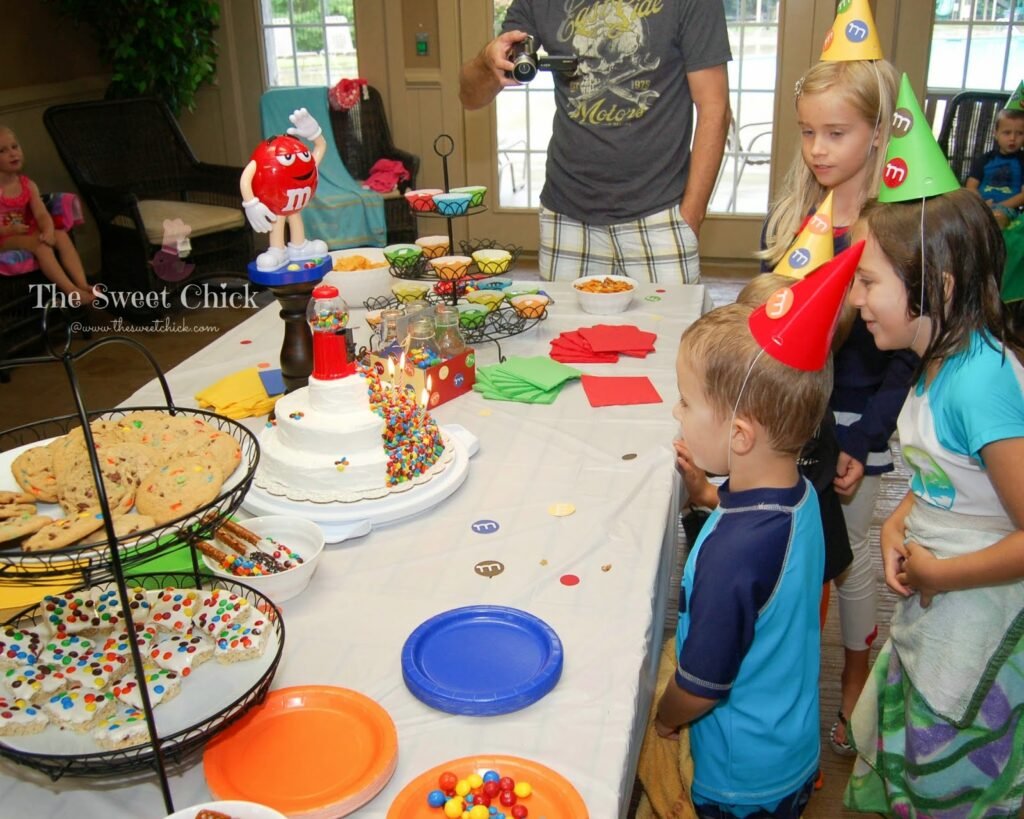
I put together my son’s 4th birthday party last week. He’s into a lot of things, but nothing in particular stood out as a theme. That is until someone posted a photo of an M&M wedding cake on Facebook. I had my inspiration. My son loves M&M’s in all different varieties. He devours whatever flavored M&M’s I buy to make recipes with. He’s not picky when it comes to his favorite candy. So I researched Pinterest for DIY party decor and kept my eyes open when I was out shopping. I tried to keep it simple because it wasn’t going to be a terribly big party, but I wanted it to be special for him.
I put together my son’s 4th birthday party last week. He’s into a lot of things, but nothing in particular stood out as a theme. That is until someone posted a photo of an M&M wedding cake on Facebook. I had my inspiration. My son loves M&M’s in all different varieties. He devours whatever flavored M&M’s I buy to make recipes with. He’s not picky when it comes to his favorite candy. So I researched Pinterest for DIY party decor and kept my eyes open when I was out shopping. I tried to keep it simple because it wasn’t going to be a terribly big party, but I wanted it to be special for him.

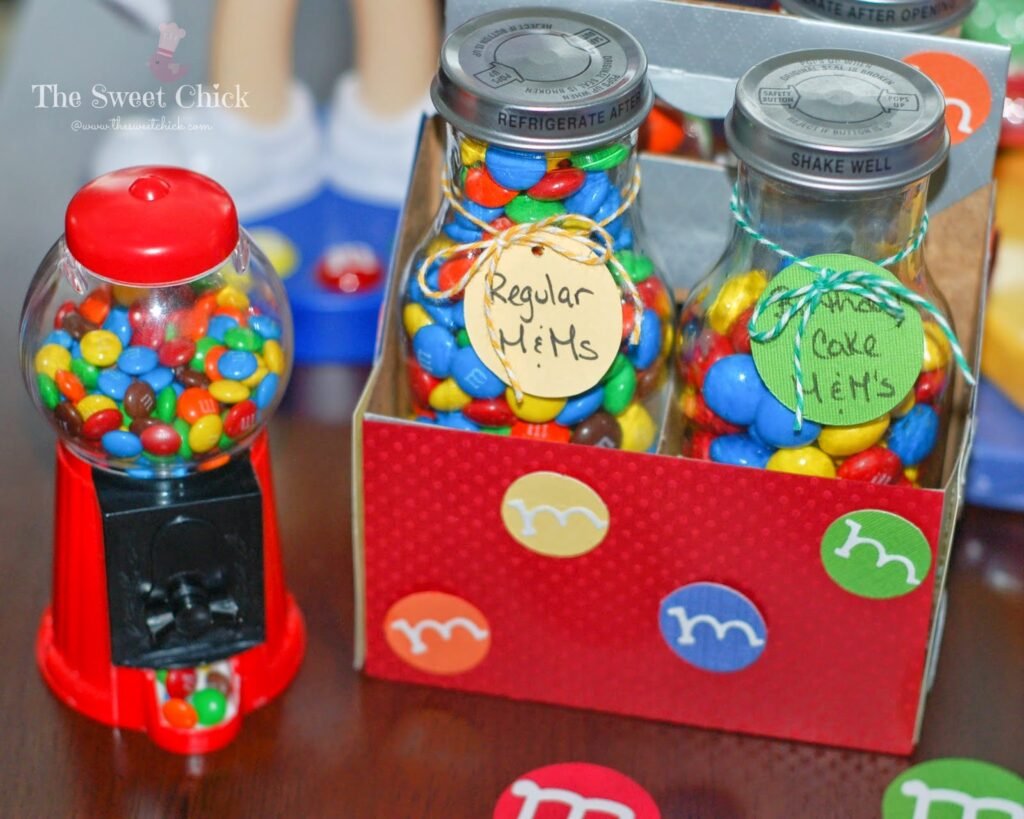
The first thing I had found was 10 inch red plastic M&M dispenser at CVS pharmacy. I used that as my centerpiece. It was too cute to pass up. Then I found a small 5 inch plastic bubble gum machine at Toys R Us that I used as a cake topper.
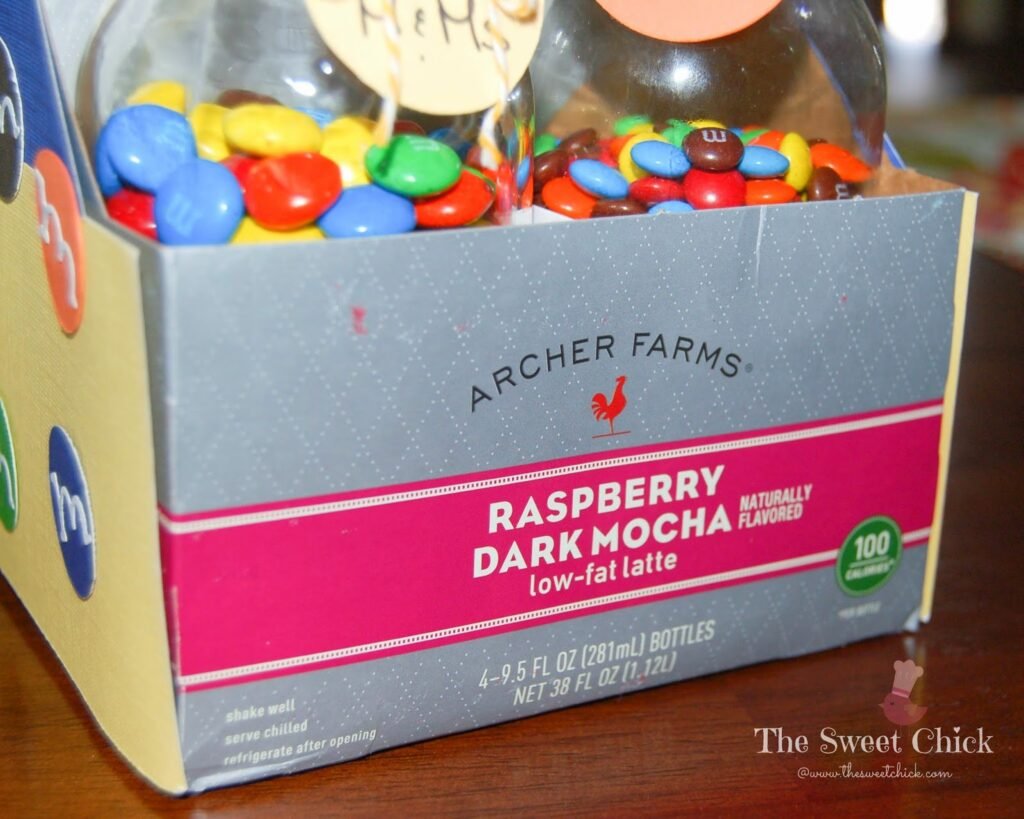
I wanted the party goers to have a selection of M&M’s to choose from, so I decorated a Archer Farms carton with some card stock I had on hand. I cut out some circles with my Fiskars ShapeCutter Template, then embellished it with little “m’s” I cut out with my Sizzix Sizzlets dies in the Bounce font (which apparently they don’t make anymore, my scrapbook tools are now antiques). I added some circle tags to label the M&M flavors.
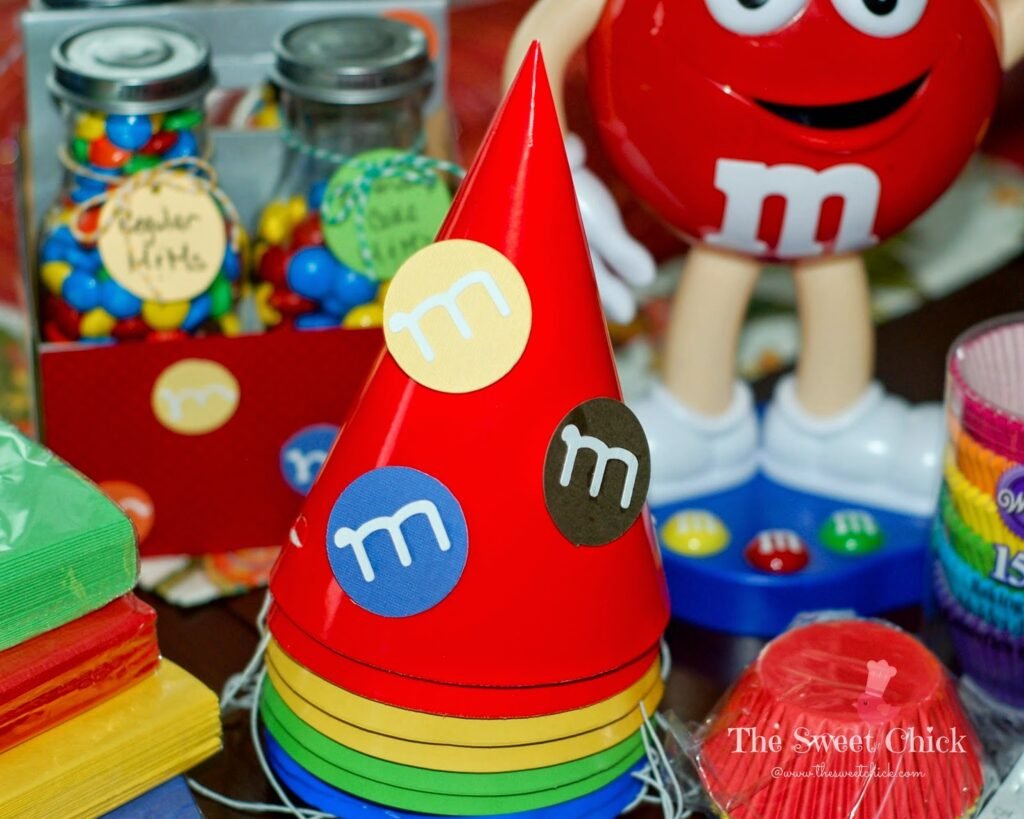
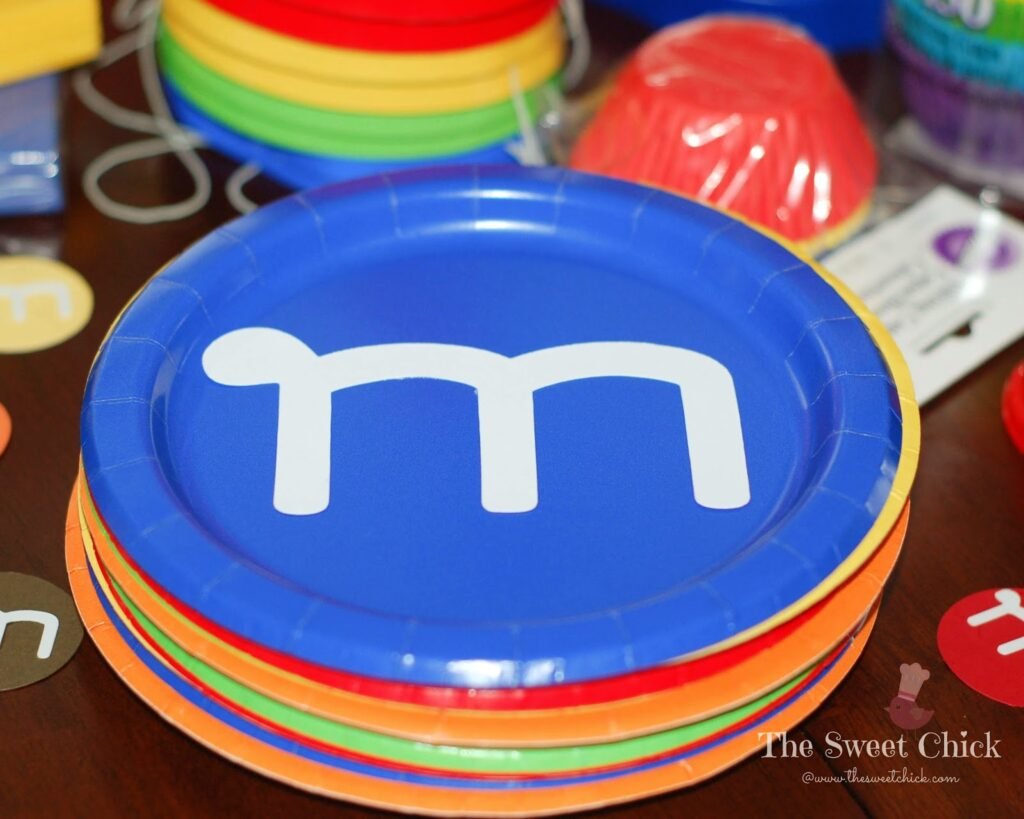
I found most of my other supplies at Walmart. I bought plates, napkins, and party hats in all the M&M colors (except brown). I jazzed up the plain party hats with some more cut outs. For these “m’s”, I used my Cricut machine with the Tear Drop cartridge. I was trying to use what I had on hand. If you want the official “M”, you can find it on the Cricut Plantin SchoolBook cartridge.
I used my Cricut machine to cut out these big “m’s” also. This was one of the ideas I found on Pinterest for wall decorations. I used double stick tape to keep them up.
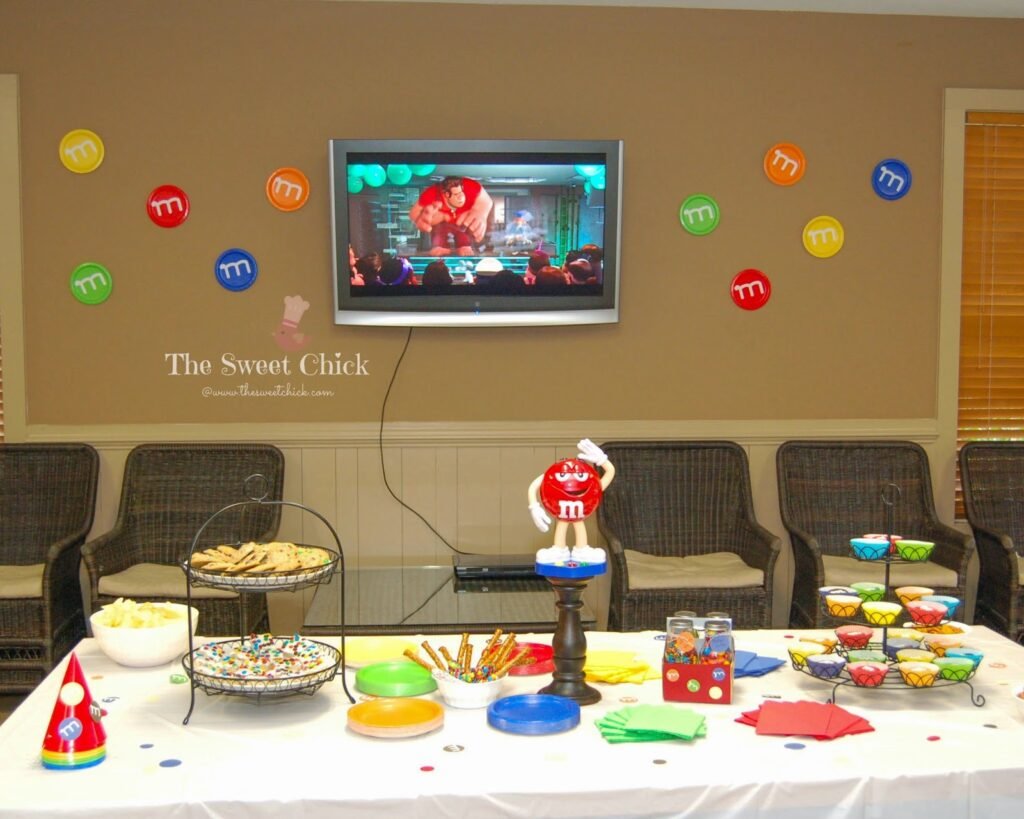
He’s the whole thing all together. Simple, but colorful and fun. It was raining outside, so we played some movies for the kids, but they didn’t care, they ended up going in the pool anyway.

I made all sorts of treats to go with the theme, Chocolate Chip M&M Cookies, M&M Rice Krispie Treats, M&M Pretzel Sticks, and more.
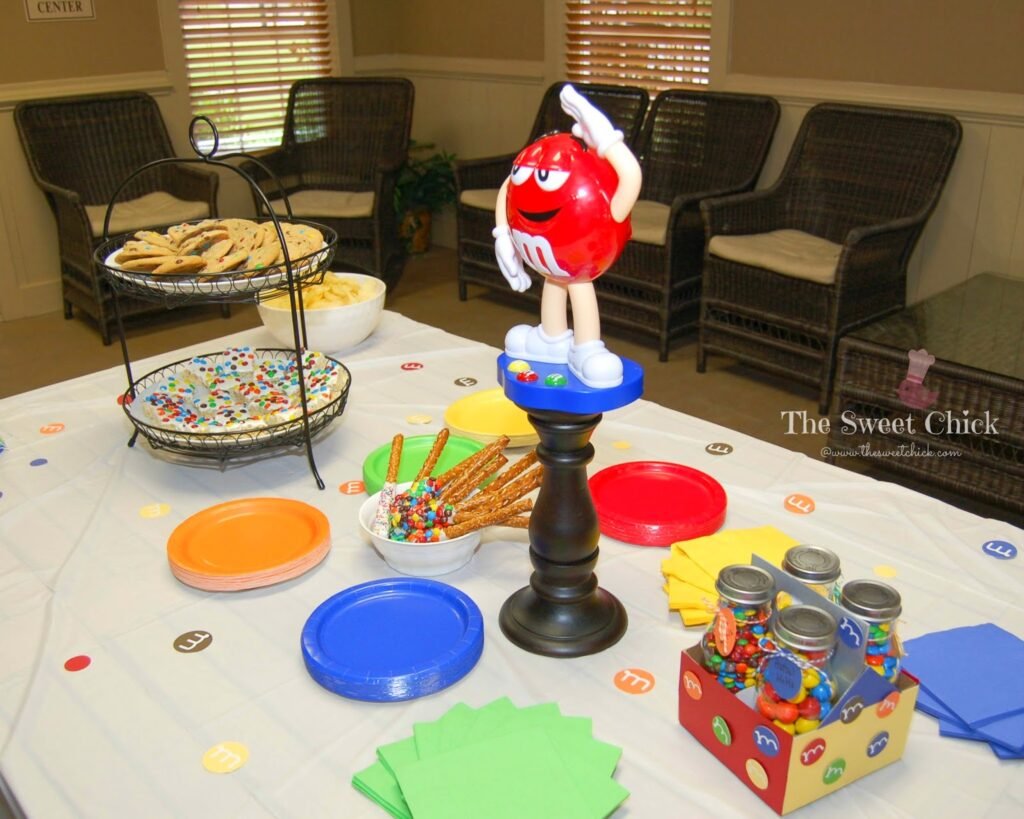
I use the extra “M’s” I cut out to decorate the table. I placed the M&M dispenser on a candlestick holder I had to make him more prominent.
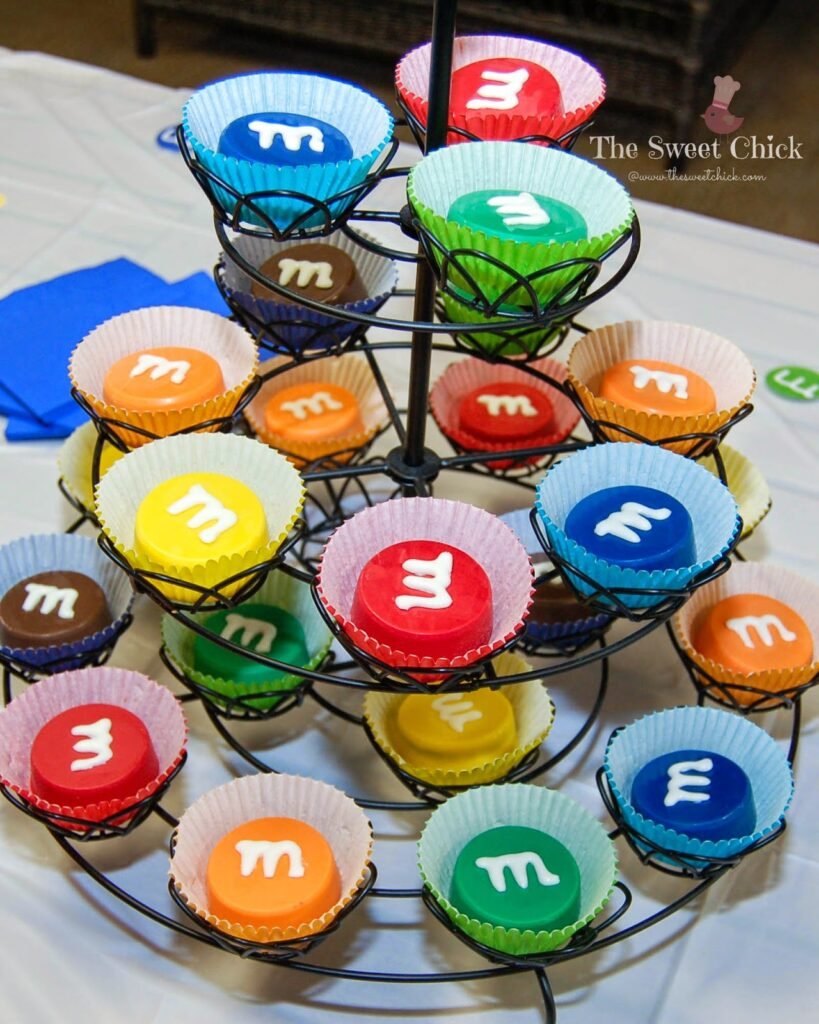
Here are the Candy Coated Oreo M&M’s I blogged about earlier this week. I placed each in matching cupcake liners from Wilton that I had found at Walmart.
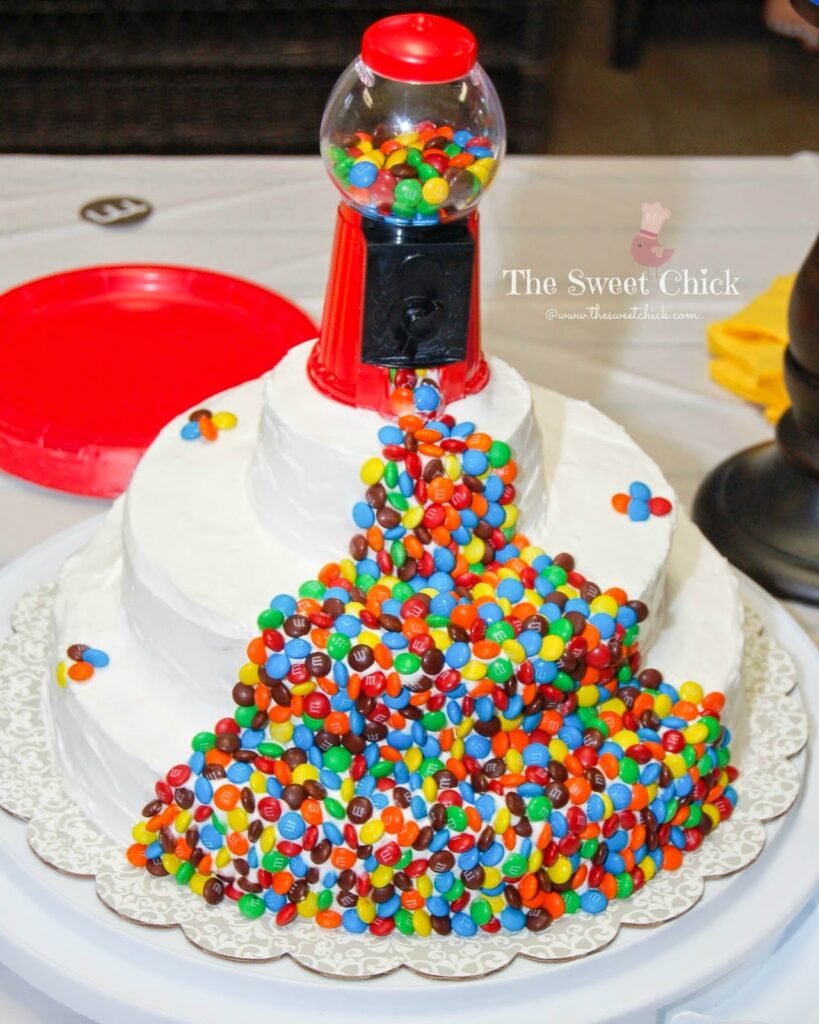
This is the cake I made, inspired by this one below. The kids thought it was amazing. Mission accomplished.
Here’s the birthday boy all smiles when he saw his cake. He was excited by all the mini M&M’s pouring down the front. All the kids wanted a slice with the M&M’s on it.

The cake was just two Pillsbury Funfetti cake mixes and two cans of Betty Crocker Fluffy White frosting. I knew I would be spending all my time perfecting the decorating, so I didn’t make the cake and frosting from scratch this time. Plus, I really love Funfetti cake. And if you are wondering if I place each M&M individually on the cake , the answer would be YES! My husband thought I was nuts. He said I should just throw them on there, but I am a type A personality and everything has to be perfect.
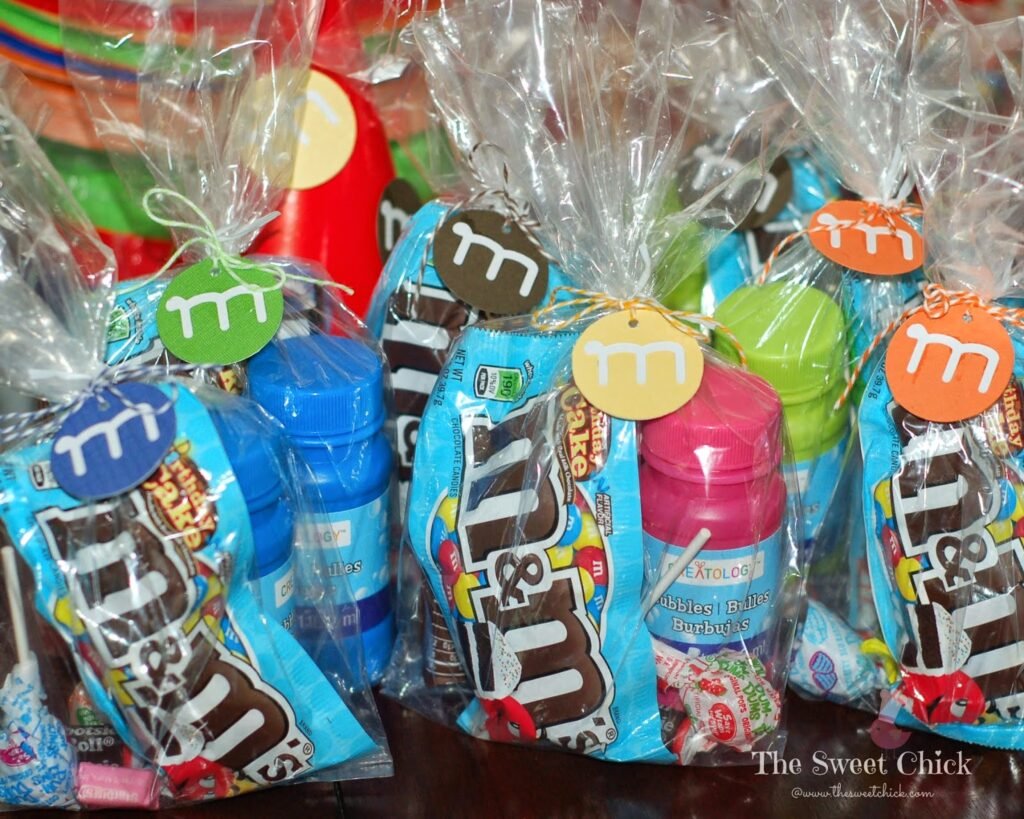
For the favor bags, I bought individual packs of Birthday Cake M&M’s and added some bubbles and other candies. The clear bags are from Walmart and the tags I made myself. I put all the kids names on the back. I attached the tags with matching bakers twine I had on hand.
It was a lot of work, but I like being creative. The looks on the kids faces said it all, it was worth it.