Pumpkin Spice Marshmallow Puffs

I was watching the Pillsbury Bake-off Contest 2013 all weekend via Instagram. There were a lot of my favorite bloggers in attendance. The whole event looked a lot of fun from their media perspective, but I couldn’t imagine how much pressure the contestants were feeling trying to win $1 million dollars. That’s just crazy. I don’t think I could perform under that kind of pressure. But I would love to know how it feels to win. Perhaps someday I will enter. In the meantime, I was inspired to whip up these little treats for the family this weekend.

This recipe is adapted from the 1969 Pillsbury Bake-Off Contest winning recipe, the Magic Marshmallow Crescent Puffs. I had some leftover Jet-Puffed Pumpkin Spice Mallows in the pantry and didn’t want them to go to waste. I actually never made the marshmallow puffs before.

My daughter had a blast helping out. They are easy enough for a 7 year old to put them together.

Just dip the marshmallows in the butter and in the sugar mixture. Then roll them up in the crescent. Since the Pumpkin Spice Mallows are smaller than a regular marshmallow, I used two. And I rolled them up from the wide end of the crescent instead of the narrow end. I just folded the sides in over the marshmallows and then rolled them up.

Then you need to make sure all the edges are sealed. I just pinched them a little with my fingers.

Don’t forget to dip the bottoms in the remaining butter. This helps a lot if the crescents leak and makes a sticky mess.

I did have a couple of the puffs leak out a little filling, but since I had greased my pan well and with the added butter, they came out of the pan easily.
I added a little maple syrup to the glaze for a some extra flavor. And for fun, I added some sprinkles. I like how the marshmallows melt away and leave behind a sweet, gooey filling. The maple glaze topped it off just right.
hese are a great after school treat for the kids or you can double up the recipe for a party. Enjoy!
Pumpkin Spice Marshmallow Puffs

by The Sweet Chick
Prep Time: 15-20 minutes
Cook Time: 12-15 minutes
Keywords: bake dessert snack crescent rolls pumpkin spice pumpkin spice marshmallows maple syrup crescent rolls American fall
Ingredients (8 servings)
For the puffs
- 2 tablespoons sugar
- 1 tablespoon all purpose flour
- 1/2 teaspoon pumpkin pie spice
- 1 can (8 oz.) ready to bake crescent rolls
- 16 Jet-Puffed Pumpkin Spice Mallows
- 2 tablespoons butter, melted
For the glaze
- 1/4 cup powdered sugar
- 1 teaspoon pure maple syrup
- 1 tablespoon milk
Optional toppings
- sprinkles
Instructions
For the puffs
Preheat oven to 375º F.
In a small bowl, mix together the sugar, flour and spice.
Separate crescent rolls into 8 triangles and lay on a flat surface.
First dip each marshmallow in the melted butter, then dip each in the sugar mixture and coat evenly.
Place 2 marshmallows side by side at the widest end of the crescent roll. Wrap the side inwards over the marshmallows then roll until marshmallows are completely covered.
Pinch all seam with fingers to make sure they are sealed. Repeat process for all marshmallows until all crescent rolls are filled.
Dip bottoms of each filled crescent roll in the remaining butter and place buttered side down into a greased muffin pan. You may place muffin pan on a cookie sheet in case of spillage.
Bake at 375ºF for 12-15 minutes or until tops are golden.
Remove from oven and let the crescent puffs cool for 1-2 minutes.
Then remove them from the pan and place them on a cooling rack with a wax paper underneath and prepare the glaze.
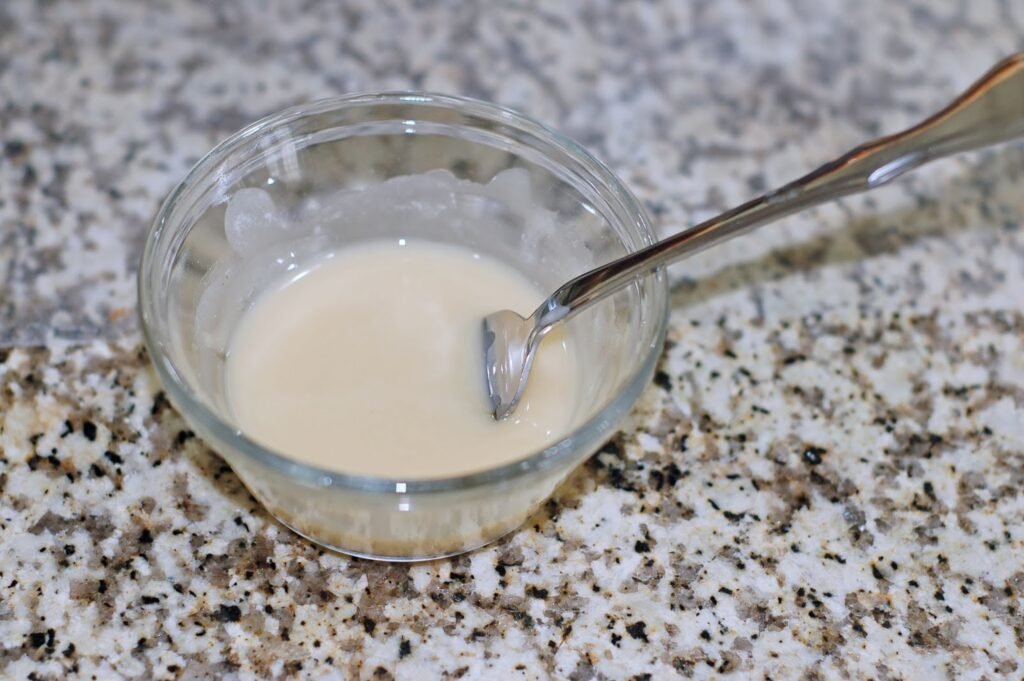
For the glaze
in a small bowl mix together the sugar, syrup, and milk until smooth.
Then drizzle evenly over the crescent rolls with a spoon and let the glaze set.
For the toppings
If you want to add sprinkles, add them before the glaze sets.
You can serve these warm or at room temperature. Either way they are just as tasty. And they still taste good the second day if placed in an airtight container.
M&M; Birthday Party

I put together my son’s 4th birthday party last week. He’s into a lot of things, but nothing in particular stood out as a theme. That is until someone posted a photo of an M&M wedding cake on Facebook. I had my inspiration. My son loves M&M’s in all different varieties. He devours whatever flavored M&M’s I buy to make recipes with. He’s not picky when it comes to his favorite candy. So I researched Pinterest for DIY party decor and kept my eyes open when I was out shopping. I tried to keep it simple because it wasn’t going to be a terribly big party, but I wanted it to be special for him.
I put together my son’s 4th birthday party last week. He’s into a lot of things, but nothing in particular stood out as a theme. That is until someone posted a photo of an M&M wedding cake on Facebook. I had my inspiration. My son loves M&M’s in all different varieties. He devours whatever flavored M&M’s I buy to make recipes with. He’s not picky when it comes to his favorite candy. So I researched Pinterest for DIY party decor and kept my eyes open when I was out shopping. I tried to keep it simple because it wasn’t going to be a terribly big party, but I wanted it to be special for him.

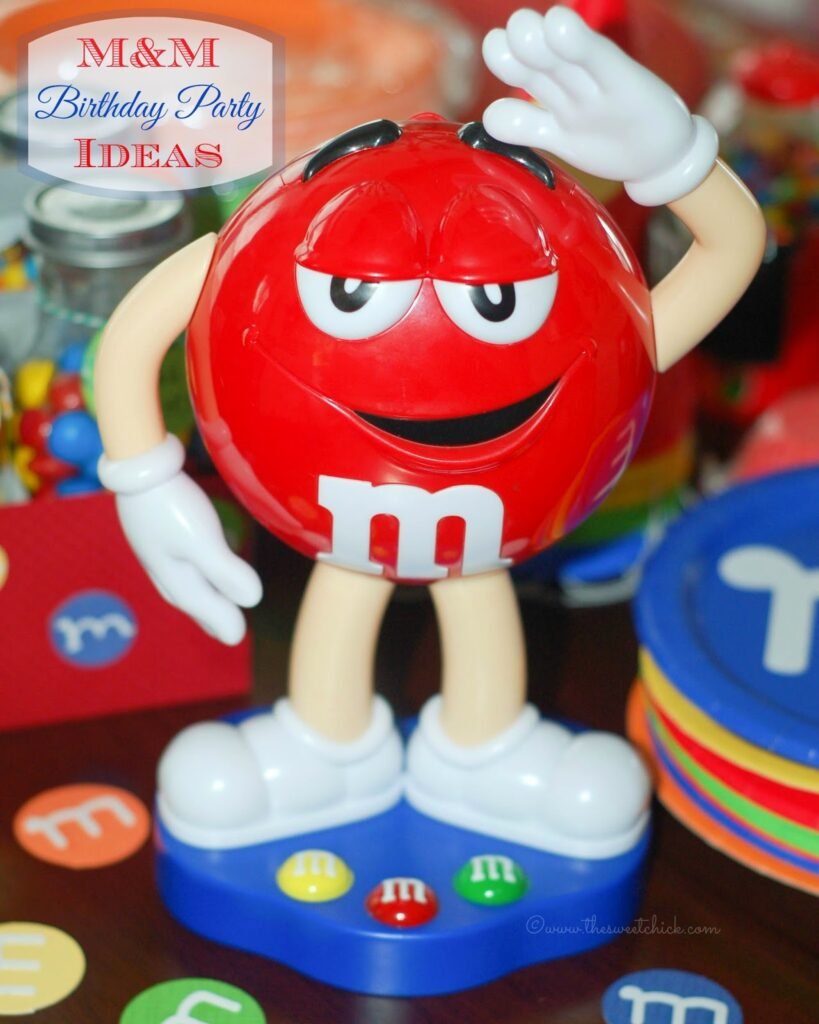
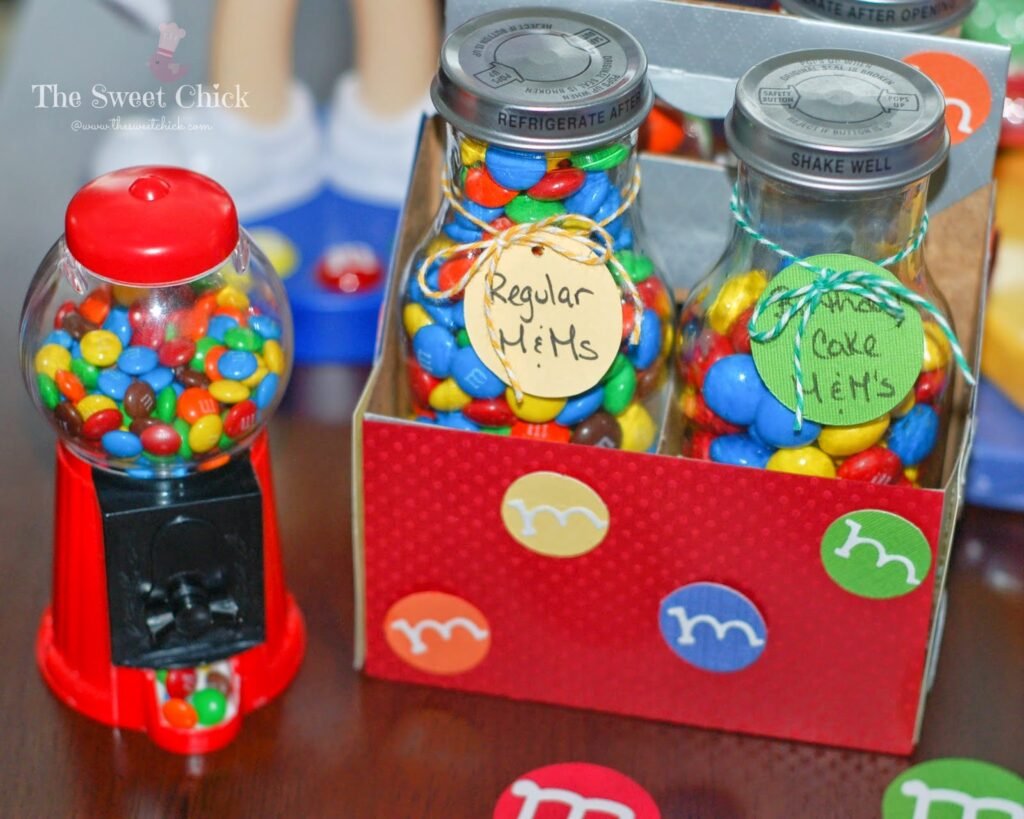
The first thing I had found was 10 inch red plastic M&M dispenser at CVS pharmacy. I used that as my centerpiece. It was too cute to pass up. Then I found a small 5 inch plastic bubble gum machine at Toys R Us that I used as a cake topper.
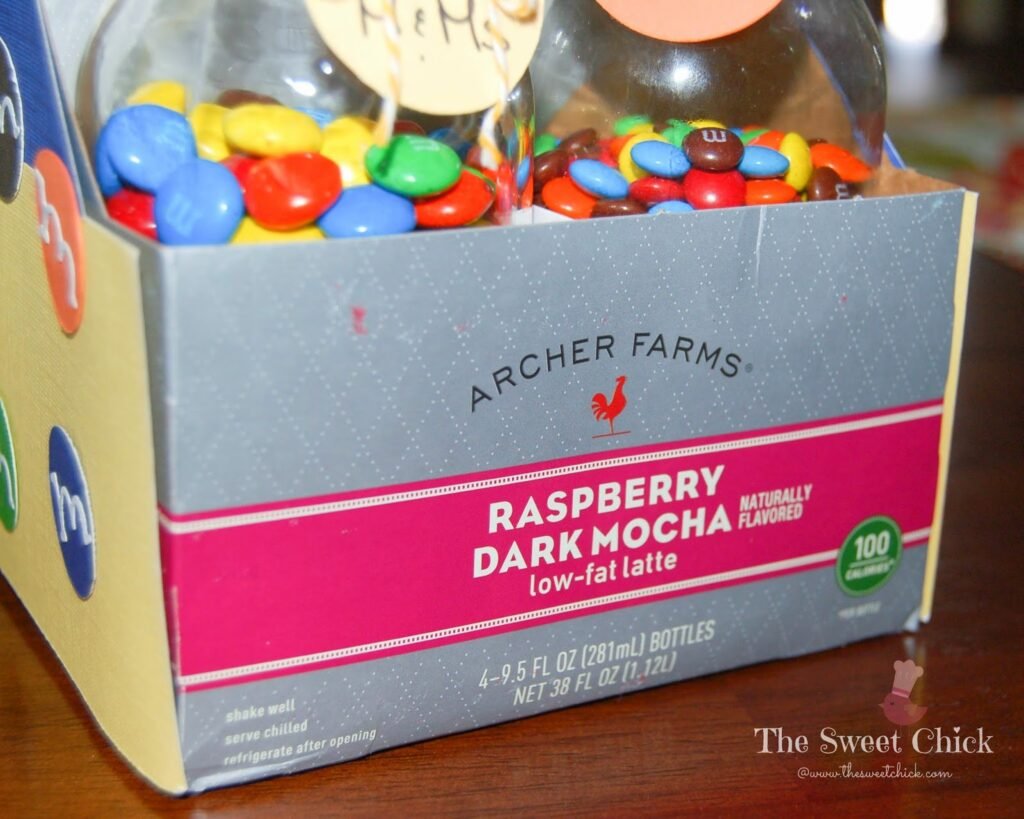
I wanted the party goers to have a selection of M&M’s to choose from, so I decorated a Archer Farms carton with some card stock I had on hand. I cut out some circles with my Fiskars ShapeCutter Template, then embellished it with little “m’s” I cut out with my Sizzix Sizzlets dies in the Bounce font (which apparently they don’t make anymore, my scrapbook tools are now antiques). I added some circle tags to label the M&M flavors.
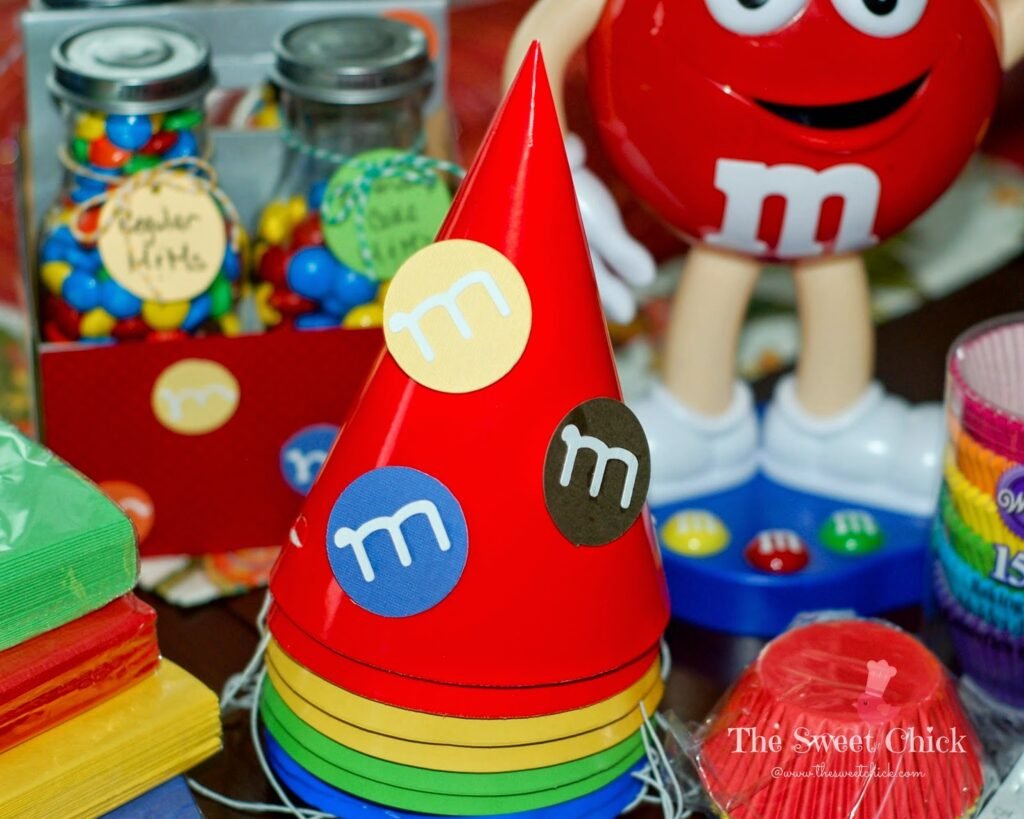
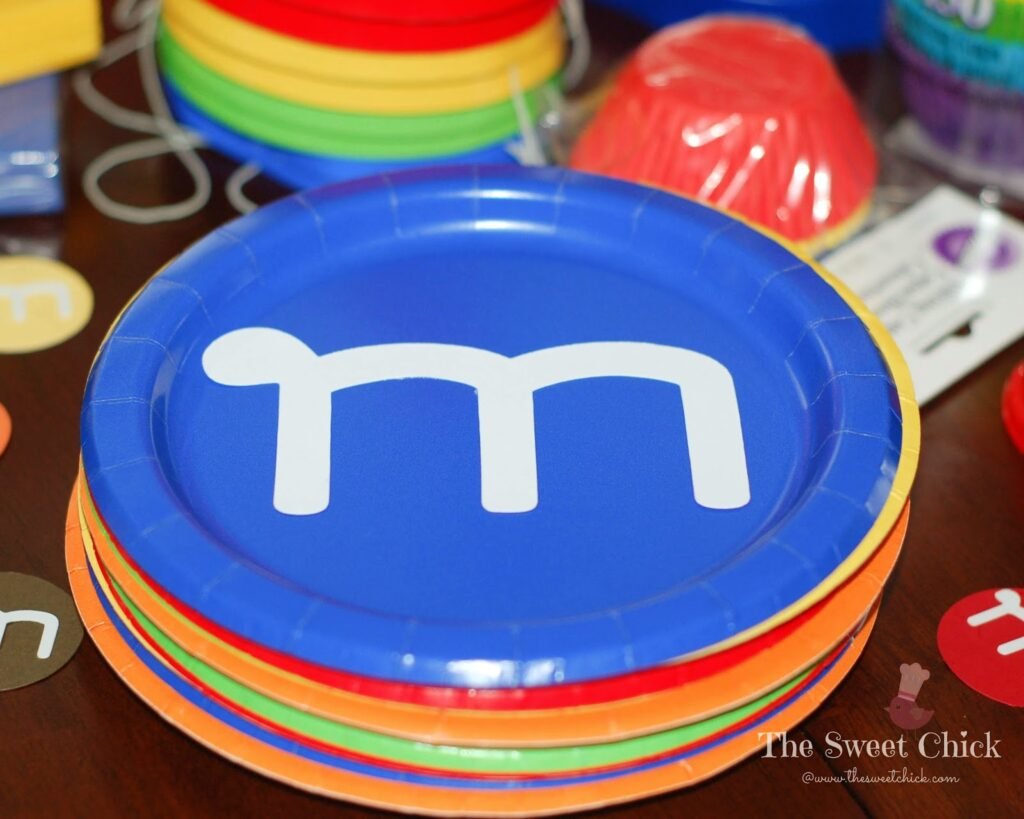
I found most of my other supplies at Walmart. I bought plates, napkins, and party hats in all the M&M colors (except brown). I jazzed up the plain party hats with some more cut outs. For these “m’s”, I used my Cricut machine with the Tear Drop cartridge. I was trying to use what I had on hand. If you want the official “M”, you can find it on the Cricut Plantin SchoolBook cartridge.
I used my Cricut machine to cut out these big “m’s” also. This was one of the ideas I found on Pinterest for wall decorations. I used double stick tape to keep them up.
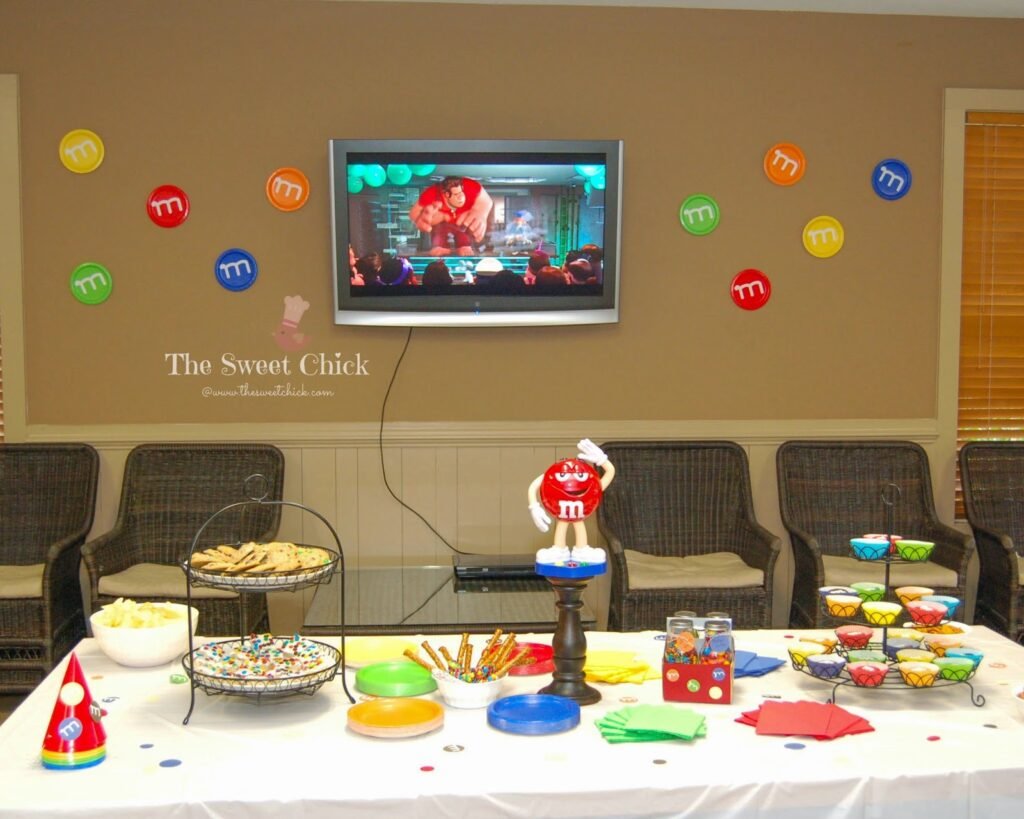
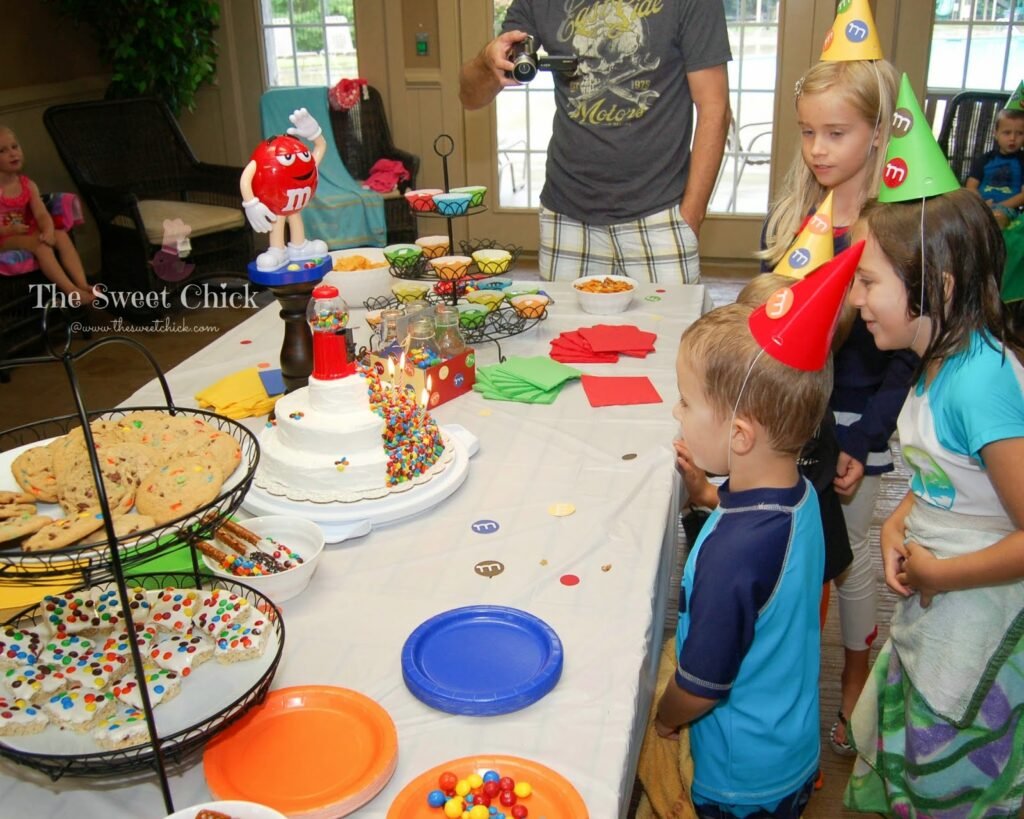
He’s the whole thing all together. Simple, but colorful and fun. It was raining outside, so we played some movies for the kids, but they didn’t care, they ended up going in the pool anyway.

I made all sorts of treats to go with the theme, Chocolate Chip M&M Cookies, M&M Rice Krispie Treats, M&M Pretzel Sticks, and more.
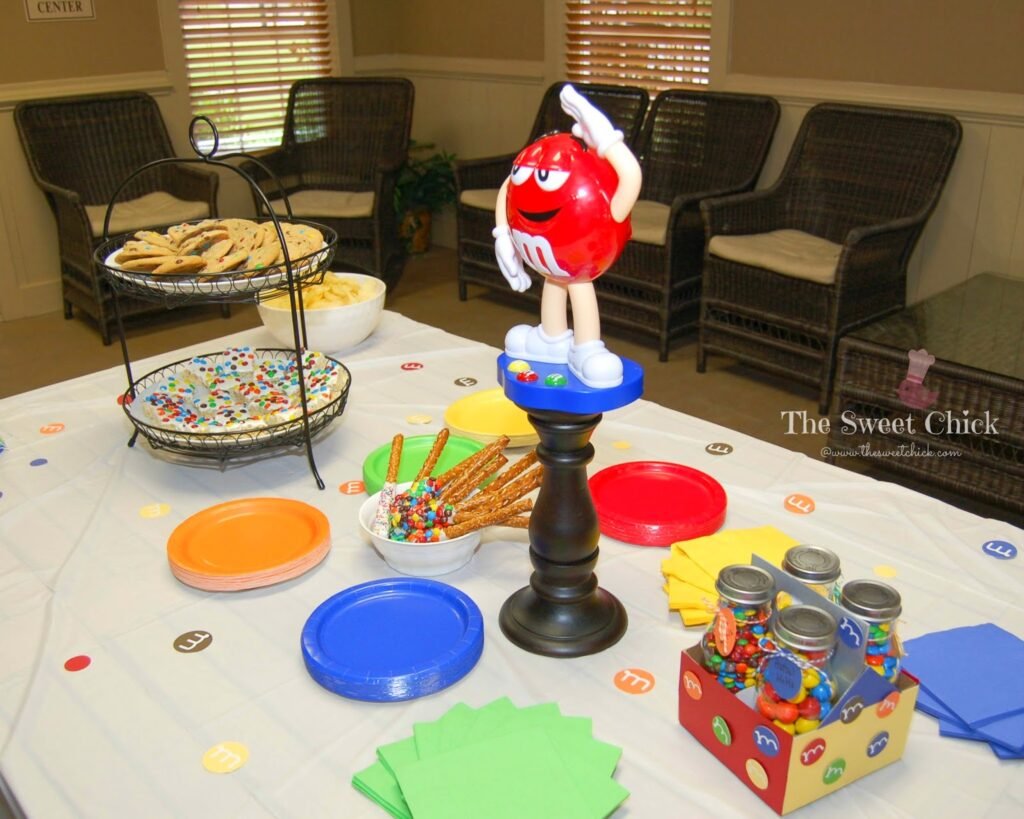
I use the extra “M’s” I cut out to decorate the table. I placed the M&M dispenser on a candlestick holder I had to make him more prominent.
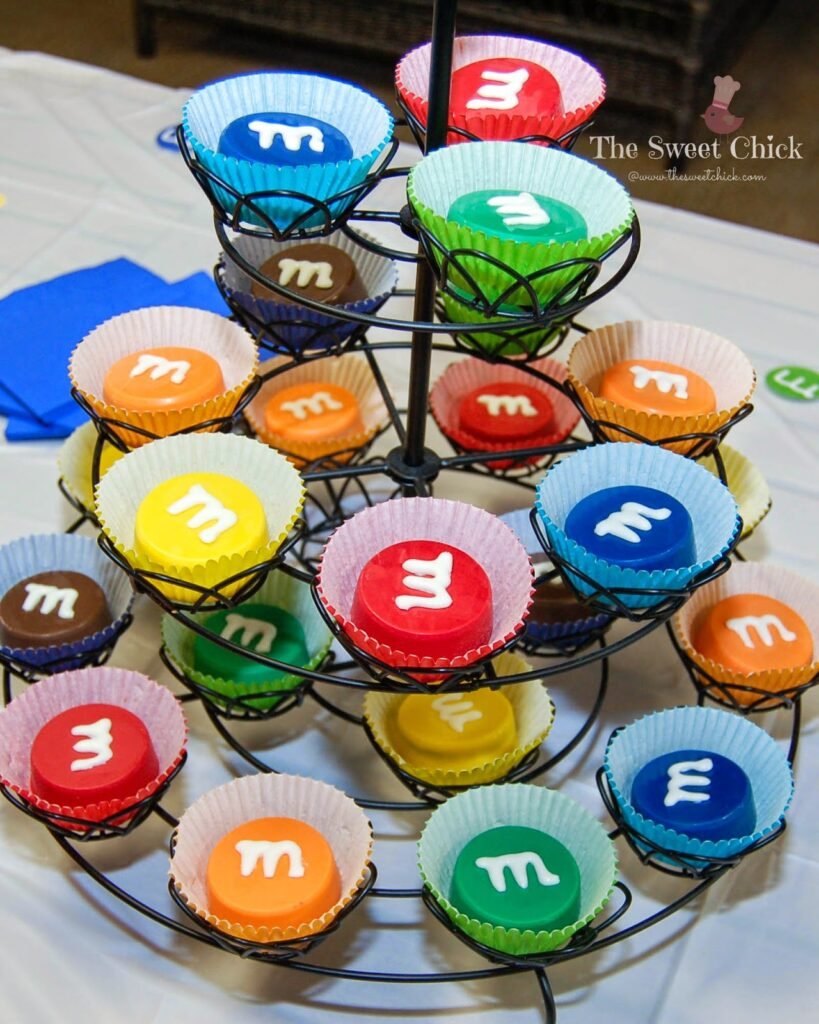
Here are the Candy Coated Oreo M&M’s I blogged about earlier this week. I placed each in matching cupcake liners from Wilton that I had found at Walmart.
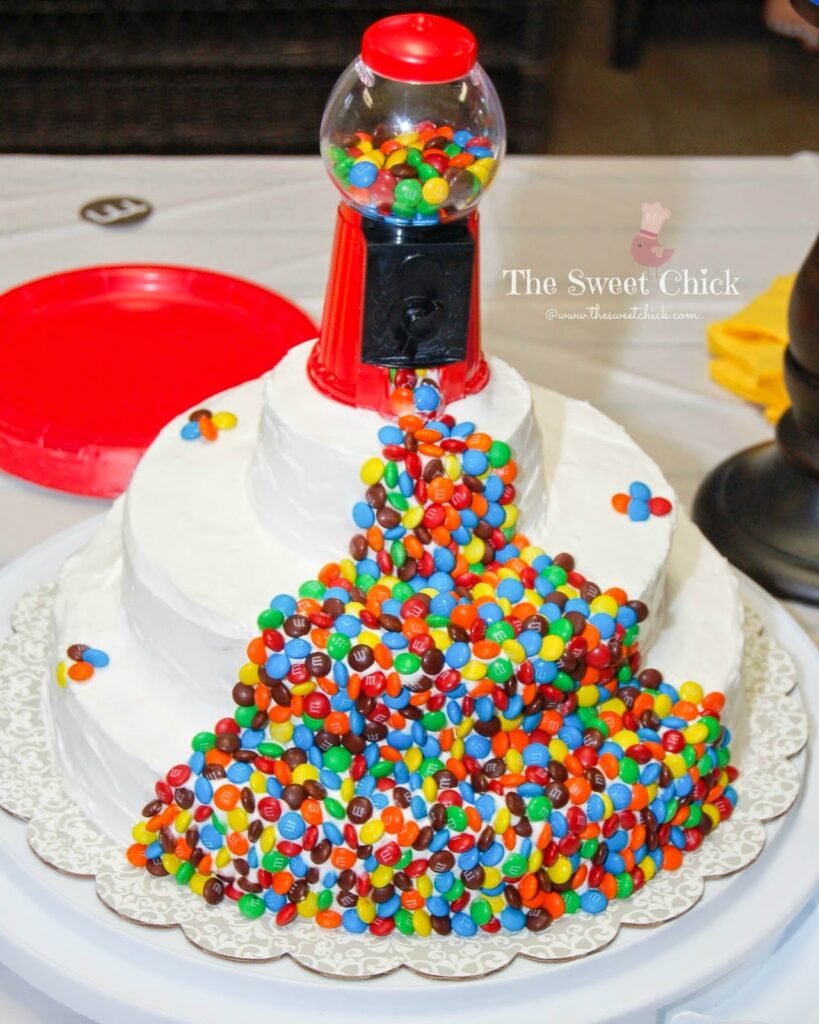
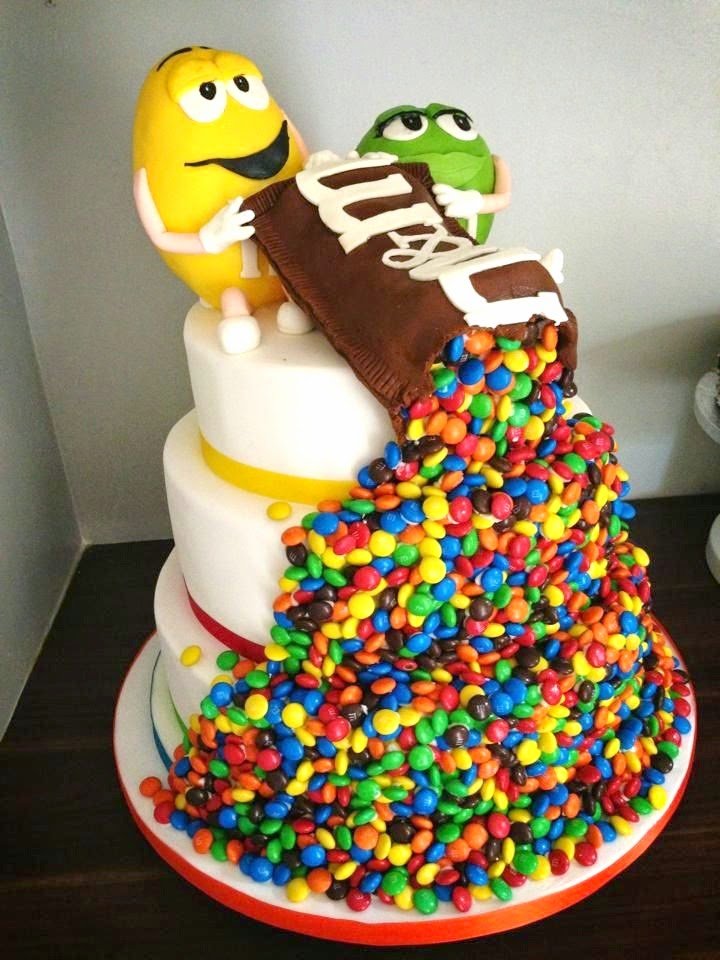
This is the cake I made, inspired by this one below. The kids thought it was amazing. Mission accomplished.
Here’s the birthday boy all smiles when he saw his cake. He was excited by all the mini M&M’s pouring down the front. All the kids wanted a slice with the M&M’s on it.

The cake was just two Pillsbury Funfetti cake mixes and two cans of Betty Crocker Fluffy White frosting. I knew I would be spending all my time perfecting the decorating, so I didn’t make the cake and frosting from scratch this time. Plus, I really love Funfetti cake. And if you are wondering if I place each M&M individually on the cake , the answer would be YES! My husband thought I was nuts. He said I should just throw them on there, but I am a type A personality and everything has to be perfect.
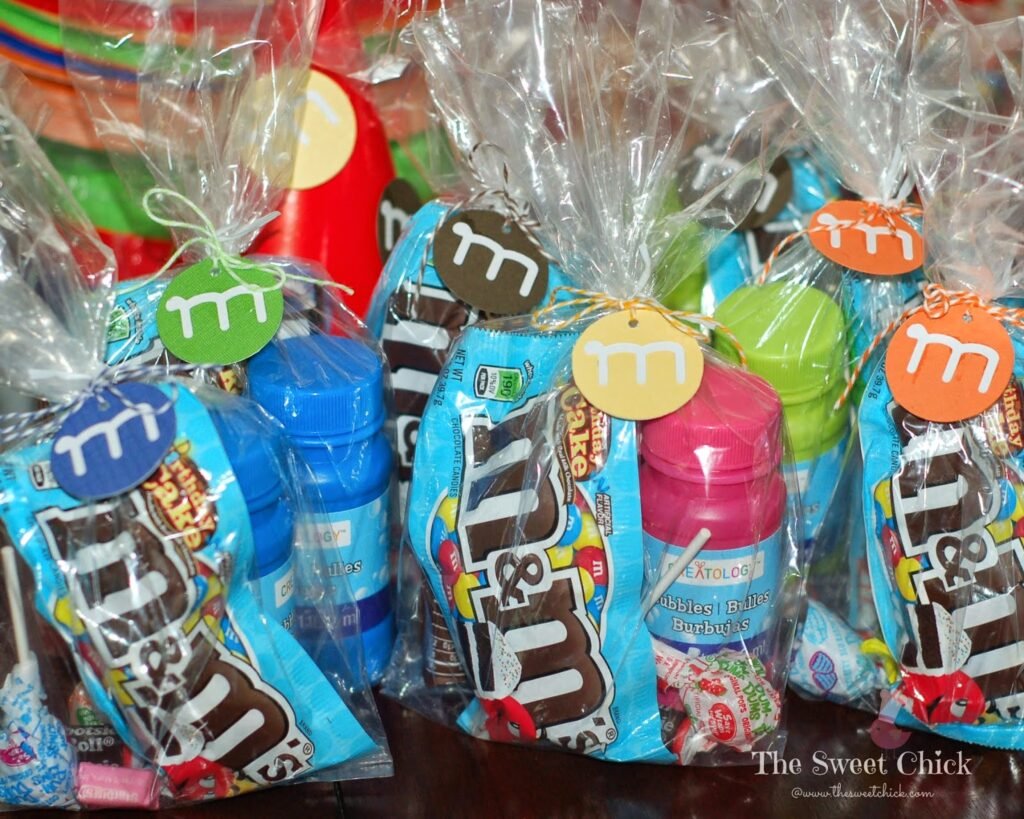
For the favor bags, I bought individual packs of Birthday Cake M&M’s and added some bubbles and other candies. The clear bags are from Walmart and the tags I made myself. I put all the kids names on the back. I attached the tags with matching bakers twine I had on hand.
It was a lot of work, but I like being creative. The looks on the kids faces said it all, it was worth it.