
Spiced Dark Chocolate Hazelnut Cookies

Medically reviewed by Christiana George Updated Date: December 17, 2022


My house is a real disaster zone right now. I am up to my eyeballs in boxes, packing tape, and bubble wrap. I have about three quarters of the house packed so far, and can’t wait to be done. In an effort to keep sane, I thought I would take a short break and make some cookies. I was in the mood for something dark and chocolatey. When Oh! Nuts sent me those dried pineapple bits and sliced guava I used for my last recipe, they had also sent a huge bag of hazelnuts. Dark chocolate and hazelnuts sounded like a great match!

I based this recipe off my Chocolate Ginger Cookies recipe. I liked how soft and chewy they were and I liked the chocolate and spice combo. But I didn’t want a ginger flavor, so I went for nutmeg this time around and I used Hershey’s Special Dark Cocoa for a darker, deeper flavor.


The hazelnuts that Oh! Nuts sent were already skinned, so that saved me a lot of time. They taste delicious right out of the bag, but I wanted to toast them a bit in the oven before adding them to the cookies. It gave them a more woodsy flavor, which I thought would go nicely with the spices I was using. I just laid them out on a lined cookie pan and toasted them for 10 minutes at 350ºF.

If you are looking for a different nuts, seeds, or nut butters, Oh! Nuts has a wide variety. Just go to

This picture just makes me want to dig in right now and eat the dough right out of the bowl.

Wow! I think I may like nutmeg more in my cookies than ginger. It really brought the dark chocolate and toasted hazelnuts to a new level. I love all the textures too, the chewiness of the cookies themselves, the gooeyness of the dark chocolate chips, the crunchiness of the hazelnuts. They were a hit with my daughter and husband. I had to freeze some before we ate them all. We are going to need snacks on moving day.
Spiced Dark Chocolate Hazelnut Cookies
by The Sweet Chick
Prep Time: 15 minutes
Cook Time: 8 minutes
Keywords: bake dessert snack dark chocolate dark chocolate chips hazelnut nutmeg cookie American fall winter
Ingredients (36 cookies)
- 2 1/4 cups all purpose flour
- 1/2 teaspoon ground cloves
- 1/2 teaspoon ground nutmeg
- 1/2 teaspoon ground cinnamon
- 2 teaspoons baking soda
- 1/2 teaspoon salt
- 1/4 cup Hershey’s Special Dark Cocoa
- 1 cup brown sugar
- 3/4 cup (1 1/2 sticks) butter, softened
- 1/4 cup dark molasses
- 1 large egg, beaten
- 4 tablespoons milk
- 1/2 cup rolled oats
- 1/2 cup dark chocolate chips
- 1/2 cup chopped, toasted hazelnuts
Instructions
Preheat oven to 375º F.
In a stand mixer, place the flour, cloves, nutmeg, cinnamon, baking soda, salt, cocoa and sugar. Mix on low speed for 2 minutes.
Then add the butter, molasses, egg, and milk. Mix on low until well blended.
Next add oats, chocolate chips, and hazelnuts. Mix on low until all incorporated.
With a cookie scoop measure out dough and place on greased cookie sheet about 2 inches apart.
Bake 8-10 minutes at 375º F ( I found that 8 minutes was enough time to keep the cookies soft and chewy with a slight crispiness on the outside, but everyone’s oven is different).
Remove from the oven and place on cooling racks until completely cooled.
Grab a glass of cold milk or a mug of coffee and a couple of cookies and enjoy!
Disclaimer: Oh! Nuts did provide me with some of the products used to make this recipe, but I was under no obligation to develop a recipe for them nor provide a favorable review. All thoughts and opinions are my own.
Related Posts




Subscribe for New Racipies
Get mental health tips, updates, and resources delivered to your inbox.
Pumpkin Spice Oreo Truffles

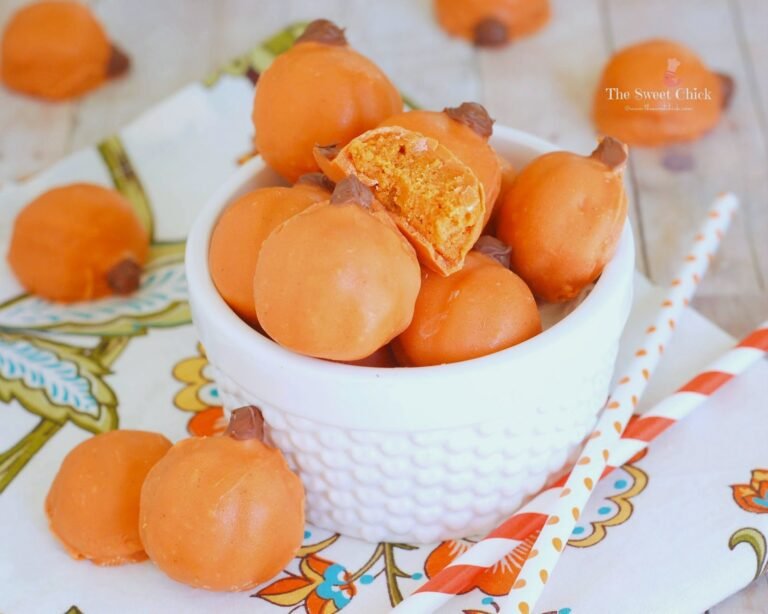
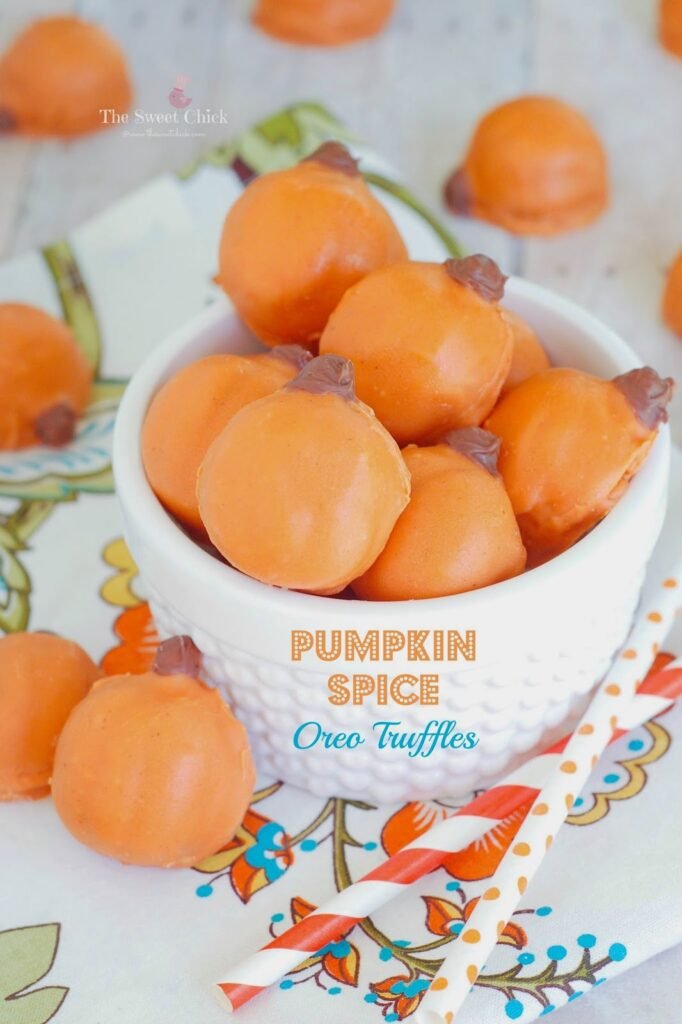
Well, I had to find something to do with the leftover Pumpkin Spice Oreos I had from last week’s Krispie Pumpkin Spice Oreo Tartlets, so I made some truffles. I love Oreo truffles. They are so easy to make and with all the different Oreos that keep coming out, there is a flavor for everyone’s liking. And you can shape the dough in a variety of ways. I used a pumpkin ice cube tray to shape these pumpkin truffles.

The Pumpkin Spice Oreos and the silicone pumpkin ice cube trays were purchased at Walmart. The Wilton’s Pumpkin Spice candy melt is from Michael’s.
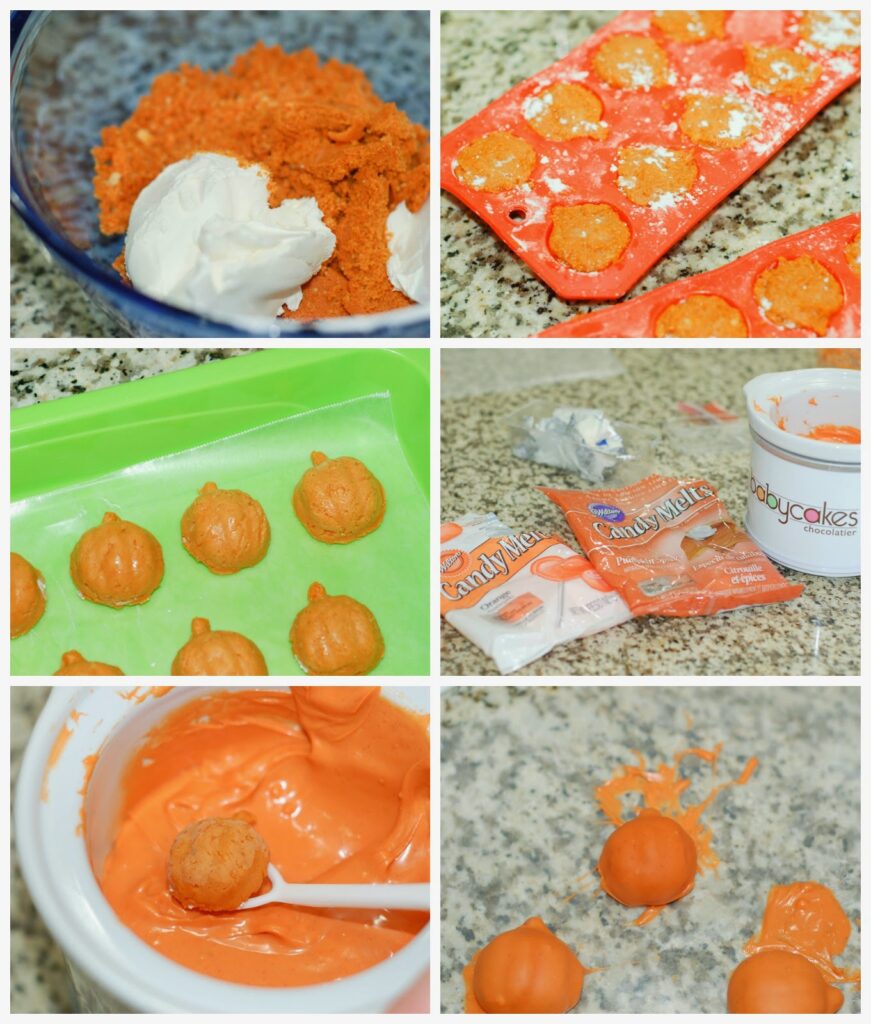
You could just go the easy route and make traditional round truffles, but I thought pumpkins would be cute. I dusted the silicone trays with some powdered sugar to keep the dough from sticking. I pressed the dough into the pumpkin cavities by hand, making sure it was pressed down firmly. Then I popped them into the freezer overnight. The pumpkins came out pretty easy from the molds. What gave me the most problems was the Pumpkin Spice candy melt. I don’t know if I got a bad batch or I had water in my container, but the candy wouldn’t melt. I tried adding vegetable shortnening and that didn’t work. So then I pulled out my Babycakes chocolatier to melt it and added some orange candy melt I had to the batch. Finally, that worked and the candy melt still had plenty of pumpkin spice flavor and came out a brighter shade of orange. So all worked out well.

For the stems, I just melted a few bits of chocolate chips in the microwave and painted the chocolate on with one of my cake decorating paint brushes. You could also use a regular clean paint brush. You could also paint on some vines and leaves with some green candy melt like I did for my Maple Pumpkin Rice Krispie Treats. Either way they taste awesome.
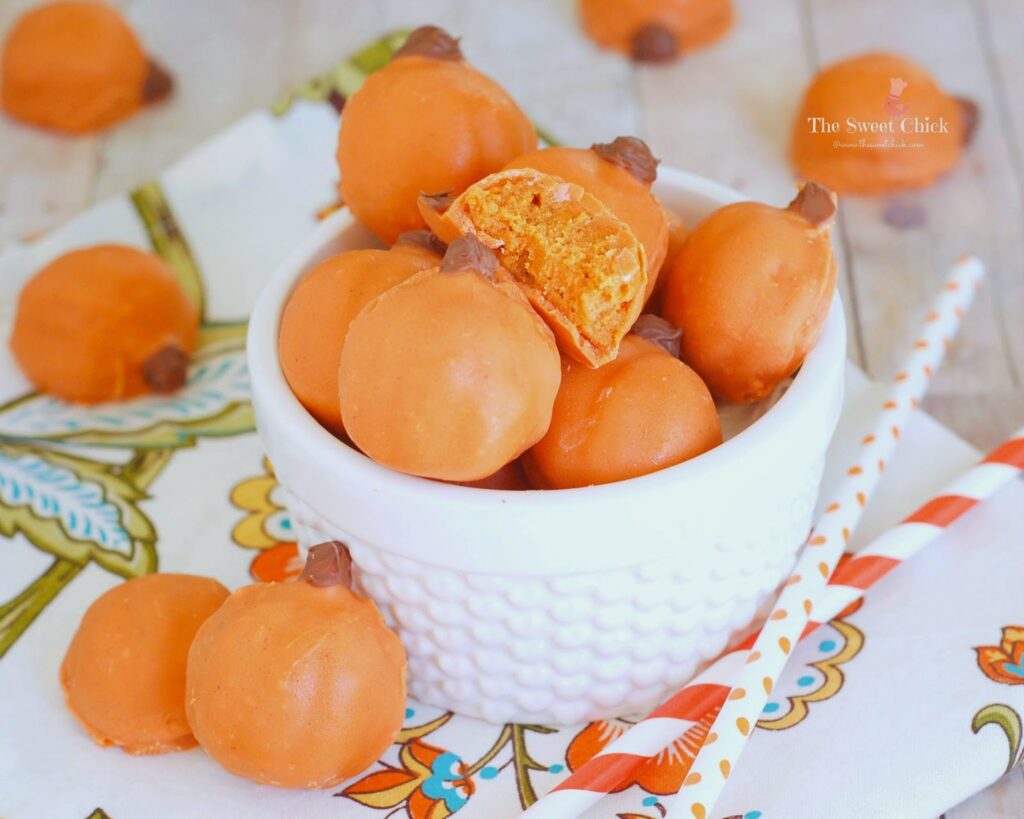
I just love a crunchy outer shell with a creamy, flavorful center. The pumpkin spice in the Oreos and in the candy melt worked really well together. And I think the little pumpkins came out cute. The kids sure did like them.
Pumpkin Spice Oreo Truffles
by The Sweet Chick
Prep Time: 1.5hs w/freezer time
Keywords: no bake dessert snack pumpkin spice oreos cream cheese candy melt Halloween truffles American fall
Ingredients (20 truffles)
For the truffles
- 12 Pumpkin Spice Oreos
- 4 oz. cream cheese, softened
For the coating
- 1/2 package (5 oz.) Wilton’s Pumpkin Spice candy melts
- 1/2 package (5 oz.) Wilton’s candy melts, orange
- 8-10 Ghirardelli milk chocolate chips
Instructions
For the truffles
Crush Oreo cookies in a food processor until they are a dirt like consistency.
In a medium bowl, mix the crushed Oreos and cream cheese until completely combined.
Lightly dust your silicone molds with powdered sugar or flour, removing any excess.
Add a small amount of Oreo dough to each cavity pressing down with your fingers until cavity is full.
Place the molds in the freezer for at least 1 hour to set. (I left mine overnight.)
For the coating
Combine and melt all the candy melt according to the instructions on the package. You may wish to place the melted candy into a warmer like the Babycakes Chocolatier to keep it from hardening up on you.
Once the candy melt is ready, remove one tray at a time from the freezer and pop out the pumpkin truffles.
With a fork or candy dipping tool, dip the truffles one at a time into candy coating mixture until all covered.
Once covered, remove and softly tap until excess candy melt falls off. Then place the truffles on wax paper until the candy melt hardens. You can place the truffles in the fridge to quicken the process.
Once the candy melt is set, you can paint on the stems. Simply place the chocolate chips in a microwave safe container and microwave for 20-30 seconds.
Using a clean paintbrush, paint the melted chocolate onto the stems of the pumpkin truffles and let it set.
Keep truffles refrigerated until ready to serve.
Notes
It is best to have the dough as frozen as possible when dipping, so that it doesn’t come apart.
If your candy melt does not melt smoothly, you can add 1/2 teaspoon of vegetable shortening at a time to it until it becomes the right consistency for dipping.
If the bottoms of the truffles don’t get fully covered with candy melt, you can always dip them again.
These truffles can be made ahead of time and refrigerated for 3-4 days.
Related Posts
Subscribe for New Racipies
Get mental health tips, updates, and resources delivered to your inbox.